Update (12/122011):
Facebook has begun to roll out the Timeline feature to U.S. users and other users worldwide. You can head over to the Facebook Timeline sign up page and click the “Get Timeline” button to activate Facebook Timeline now!
September:
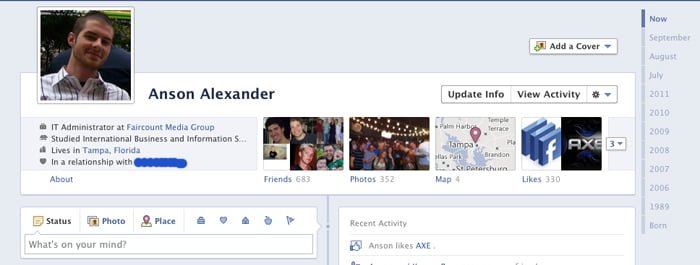
At 1pm today, Mark Zuckerburg announced the newest feature for Facebook: Timeline.
Timeline is a different way of displaying Facebook profiles so it is easier to see an actual snapshot of someone’s entire life. Honestly, during the conference I thought the feature looked quite amazing!
At one point during the announcement Zuckerburg said that the feature would be available to developers immediately and to everyone else within the next couple weeks.
Because I have a Facebook application for AnsonAlex.com, I figured I might be able to get a sneak peak at the new feature. I was right!
Once Facebook Timeline is enabled don’t forget to prepare your timeline before publishing it!
Note: This tutorial may require some basic technical knowledge but you don’t need to be a developer to do it!
How To Turn On Facebook Timeline Before Public Release:
- First you must have or create a Facebook App.
- Give the app a name and URL but don’t worry about having everything correct. Once we complete this process it will enable the feature for your Facebook account and you can forget about the app all together.
- Click Create App in the top right corner of the screen.
- Once your App is created, click on the App in the list on the left side of the page and then on the top right side of the page click edit app.
- Fill out the basic information about your app with whatever information you want, make sure that you enter information in the namespace section. See screenshot below.
Tips:
- You can use any valid URL, just make sure that you don’t put “http://” in the “app domain” section but do put it in the “site URL” section.
- You must use a unique value for your namespace but it can be anything that someone else has not chosen.
- Once you’re information is filled out and saved without error, click on “Open Graph” in the left column of the page.
- Enter an action and an object for users to do while using your app (again, this information can be made up) and click “Get Started“.
- Open a new tab and go back to your Facebook profile.
- A box will appear asking if you want to get started with Facebook Timeline Beta for Developers. Enjoy!


![How to Hide Personal Information on Facebook Profiles [Video]](https://ansonalex.com/wp-content/uploads/how-to-hide-personal-information-1-232x130.jpg)

