In the video below, I replace the battery in a 13-inch MacBook Air (Early 2017) and clean out years of dust. This is a model-specific walkthrough: newer MacBook Air models have different batteries and disassembly steps. If the battery is swollen, leaking, or damaged, shut the Mac down and arrange professional repair instead of following the removal steps.
Check your model and battery before buying parts
Choose Apple menu → About This Mac to confirm the model year. The machine in my video is the 13-inch Early 2017 Air, commonly identified as A1466 / EMC 3178 / MacBookAir7,2. A printed A1466 alone isn’t enough to establish the year, since several Air generations use that case number. Use the complete model information or serial-number lookup before ordering a battery.
The iFixit battery shown in the video currently lists the Early 2017 model as compatible. Confirm your exact model against its compatibility list at purchase time. I used an iFixit repair kit, but this is not an affiliate link or a claim that every battery sold under a similar name will fit.
You’ll need a P5 pentalobe screwdriver for the bottom case, a T5 Torx screwdriver for the battery, a way to keep the two screw lengths in their original positions, and a soft brush for loose dust. A stable work surface and an ESD-safe setup are sensible when working inside a Mac. Use the Early 2017 iFixit guide alongside the video. The repair-guide link in the video’s description points to a Late 2020 Air and is the wrong procedure for this machine.
Before opening the Mac
- Back up anything important. A battery replacement shouldn’t erase data, but hardware work is a poor time to discover that the only copy of a file lives on this Mac.
- If the old battery is healthy enough to use, let it discharge before disassembly, as the model-specific repair guide advises. Then shut down the Mac, unplug power and accessories, close the lid, and set it upside down on a soft surface.
- Check for warning signs before going further. A raised case, distorted trackpad, unusual heat, leaking, or a visibly puffy battery calls for a repair professional. Don’t charge or keep using a Mac with a suspected swollen battery. Don’t pierce, bend, squeeze, heat, or pry against the cells.
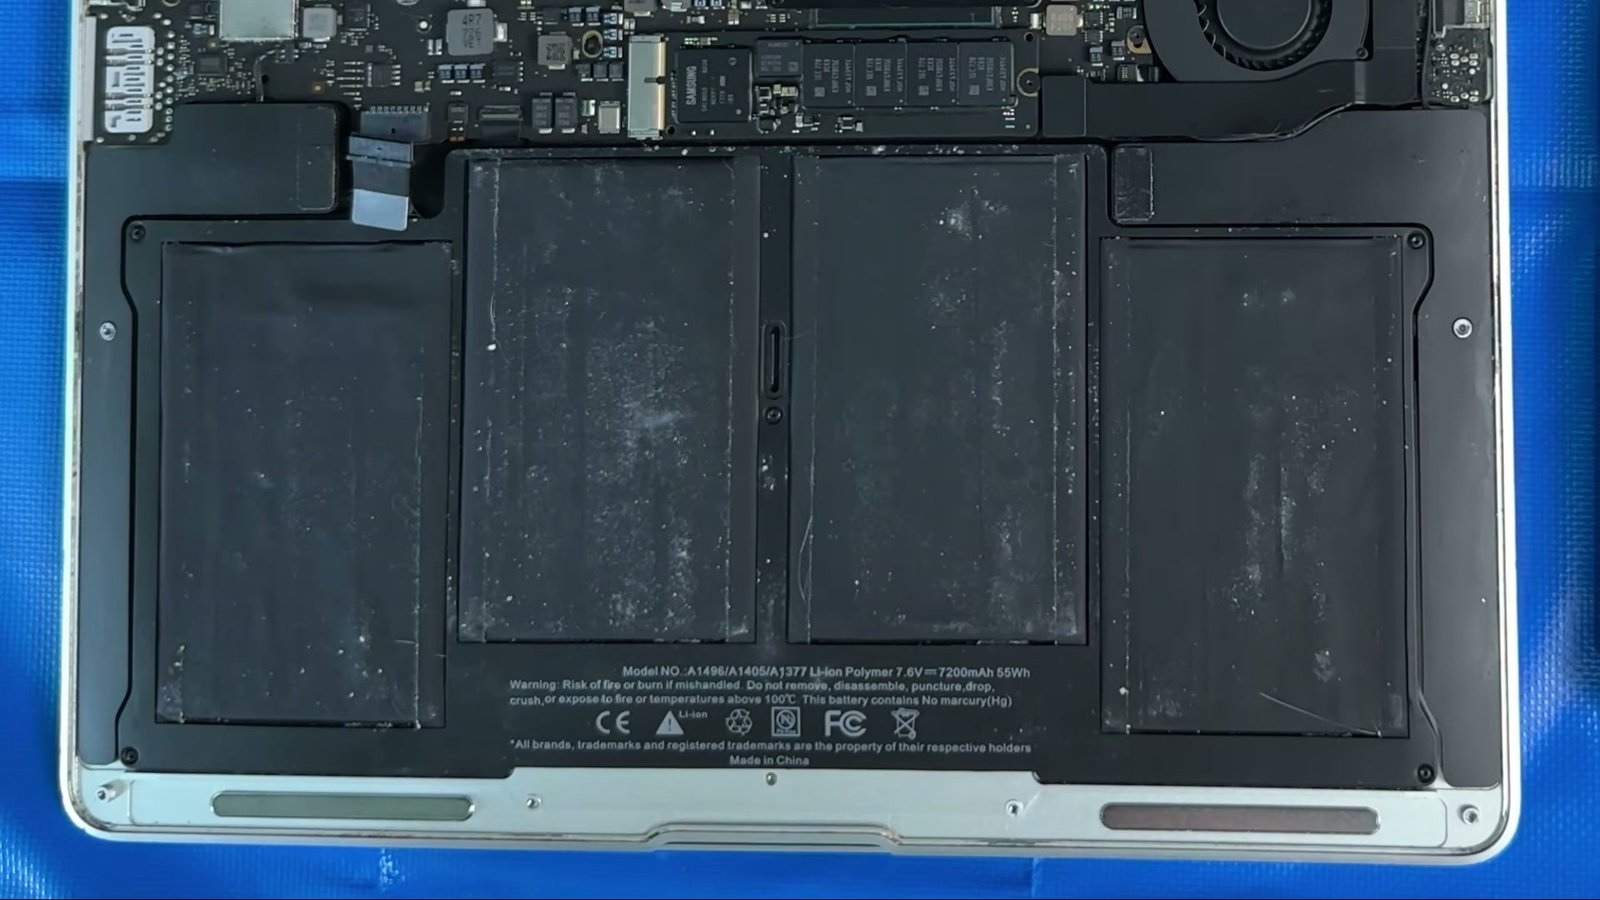
The old battery in my video has a slight visible bulge. I continued the repair on camera, but that footage should not be taken as a safe procedure for a swollen battery. If you see the same condition in your Mac, stop.
Open the 2017 MacBook Air and disconnect the battery
- Remove the ten P5 screws from the lower case. The two longer screws are 9 mm and the other eight are 2.6 mm. Arrange them in a matching pattern as you remove them; putting a long screw in a short hole can damage the case.
- Lift the lower case gently and inspect the battery before touching anything inside. If it looks swollen or damaged, leave it alone and seek service.
- For an undamaged battery, grip the clear pull tab on its connector and pull parallel to the logic board, toward the front edge of the Air. Don’t lever the connector upward. The tab and socket are the small parts to watch closely here.
Clean loose dust while the battery is disconnected
With the connector out, use a soft, dry brush to remove loose dust from accessible surfaces and the lower case. In the video, the fan area and case have visible buildup. Keep the brush away from exposed connectors and the battery cells, and don’t pour cleaning liquid into the Mac. If the fan or heat sink needs a deeper teardown, follow a separate model-specific procedure or use a repair shop.
The goal is to clear loose dust without turning a battery job into a much larger repair.
Remove the old battery and fit the new one
- Remove the five T5 screws securing the battery: three 6.9 mm screws and two 3.0 mm screws. Keep the shorter pair separate. A phone photo of the screw layout is useful before removal.
- Lift the undamaged battery by its rigid edge nearest the logic board. Avoid pressure on its four exposed cells. If it resists, stop and check for a screw you missed; don’t pry into the cells.
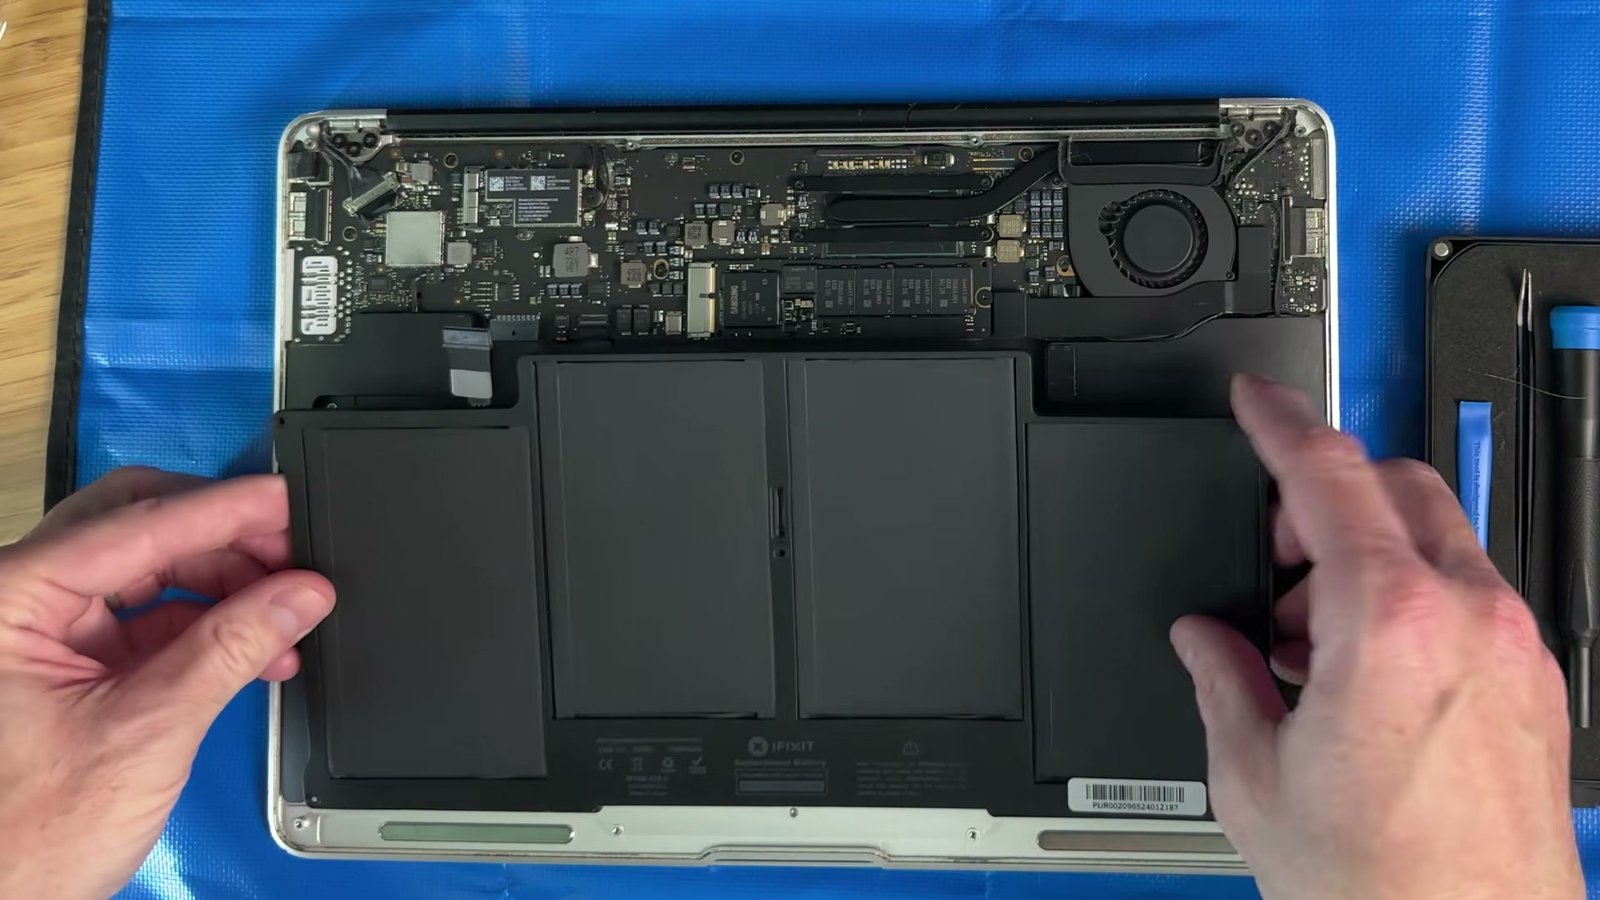
- Compare the replacement with the old battery before installation: shape, screw holes, connector and printed compatibility should line up. Place the new battery in the case without forcing it, start all five screws loosely, then snug them down with the proper driver. Stop if a head starts to strip.
- Reconnect the battery in the reverse direction, keeping the connector level with the board. Refit the lower case and return each P5 screw to its original hole.
Check the repair
Reconnect power and boot the Mac. Confirm that it charges, the trackpad works normally, and the battery-service warning is no longer present. If it doesn’t start or charge, unplug it and check the model-specific guide and connector seating before trying anything more involved. A persistent warning or unusual heat is a reason to stop and get the installation checked.
iFixit’s Early 2017 guide also includes a new-battery calibration cycle: charge to 100% and leave it charging for two more hours; use it normally until it sleeps from low charge; wait at least five hours; then charge uninterrupted to 100%. Follow the battery seller’s current instructions for the part you bought. This is a one-time setup procedure for that replacement battery, not a routine way to use your Mac.
Take the old battery to an appropriate electronics or battery recycler. Don’t put it in household trash. If the battery is swollen or damaged, ask the repair provider how it should be handled and transported.
If you’re replacing this battery to keep an older Mac in use, my macOS upgrade guide covers the separate software-support decision. A working battery does not make an unsupported macOS version current.