If your Mac restarts over and over — Apple logo, progress bar, black screen, Apple logo again — the cause is often software, although storage or other hardware can produce the same symptom. Your files are usually still there. The recovery steps below go from least destructive to most, so work through them in that order.
Start with the easy stuff and work your way up: cold boot, then unplug everything, then safe mode, then Disk Utility’s First Aid. If none of that works, reinstalling macOS is the step that usually finishes the job.
The step most people skip is the one that usually works: reinstalling macOS from Recovery keeps your files. It is not an erase.
One rule throughout: do not erase the disk. Almost nothing below requires it, and erasing is what turns a recoverable boot loop into permanent data loss.
Before you start: Apple silicon or Intel?
Every startup method below is different on Apple silicon than on Intel, so check this before anything else. On a working Mac, go to Apple menu → About This Mac. If you see Chip followed by an Apple M-series name, you have Apple silicon. If you see Processor followed by an Intel name, you have an Intel Mac.
If the Mac will not boot far enough to check About This Mac, use the startup behavior instead. On Apple silicon, shut the Mac down and hold the power button: if Loading startup options appears, you have Apple silicon. Intel Macs use startup key combinations instead.
- The power adapter, plugged in — a flat battery mimics this fault exactly
- Whether your Mac is Apple silicon or Intel — every key combination below differs
- Your FileVault password or recovery key, if FileVault is on
- An external drive, if you reach step 6 and need to copy files off
1. Shut it down completely and try again
A boot loop sometimes survives a restart but not a true power-off, because a restart leaves some hardware state intact.
- Press and hold the power button for up to 10 seconds, until the Mac goes completely silent and dark.
- Wait about 30 seconds. On a laptop, this is also a good moment to plug in the charger — a boot loop on a nearly flat battery can look identical to a software failure.
- Press the power button once to start up normally.
If it boots, do not assume it is fixed. Go straight to a backup, then run the software update that was probably interrupted in the first place.
2. Unplug every accessory
External drives, docks, hubs, and even some USB accessories can stall startup, and a failing external disk will do it every time. Unplug every peripheral except the power adapter, then try the cold boot again. If it starts, add devices back one at a time to find the culprit.
3. See if Safe Mode will boot
Safe mode loads a minimal system and runs a check on your startup disk, while blocking third-party startup items and kernel extensions. Since it skips exactly the things that usually cause a loop in the first place, just starting in safe mode sometimes fixes it — the disk check alone is enough some of the time.
On Apple silicon
- Shut down completely.
- Press and hold the power button until Loading startup options appears, then release.
- Select your startup volume (usually Macintosh HD).
- Press and hold the Shift key, then click Continue in Safe Mode.
On Intel
- Turn on or restart the Mac.
- Immediately press and hold Shift until the login window appears, then release.
You should see Safe Boot in the menu bar. Startup and login can take longer than usual in safe mode, so give the Mac time to finish.
If the Mac boots in safe mode but loops again after a normal restart, third-party startup software becomes a strong suspect. Go back into safe mode and remove or disable anything you installed or updated just before the problem started — particularly antivirus tools, VPN clients, disk utilities, and software that installed a system extension.
4. Run First Aid from macOS Recovery
If safe mode will not load, the next step is macOS Recovery, which runs from a separate partition and does not depend on your main system booting.
Starting Recovery
Apple silicon: shut down, then press and hold the power button until Loading startup options appears. Click Options, then Continue.
Intel: turn on the Mac and immediately hold Command (⌘) and R until you see the Apple logo or a spinning globe.
Running First Aid
- In the Recovery window, choose Disk Utility and click Continue.
- In the sidebar, click View → Show All Devices so the physical disk appears, not just the volumes.
- Start with the last volume listed under your internal disk — often Macintosh HD – Data — rather than the physical device itself.
- Click First Aid, then Run. Let it finish even if it looks stuck; on a large disk it can take a long time.
- Then move upward through the sidebar, running First Aid on each remaining volume or volume group, then the container, and finally the physical device.
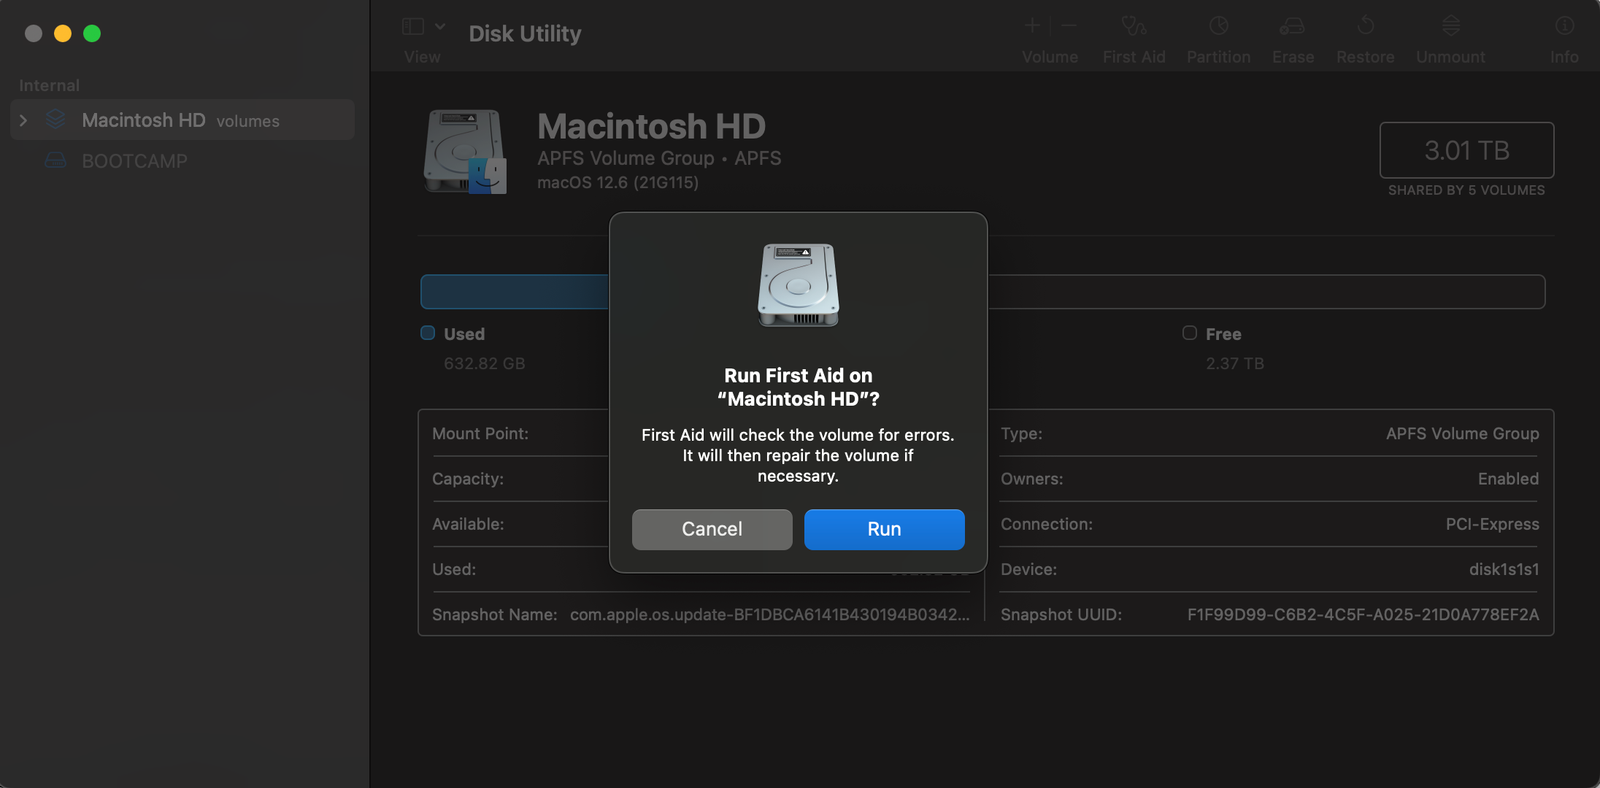
Quit Disk Utility and restart. If First Aid reported errors it could not repair, note the exact wording — that is the detail worth having if you end up talking to Apple Support.
5. Reinstall macOS without erasing your Mac
This is the step people often avoid because it sounds drastic, but it is one of the most useful fixes for a stubborn boot loop. Reinstalling macOS from Recovery does not remove your apps or personal data. It is not the same as erasing the disk, and you should still make a backup first if you can.
Do not erase the disk. Erasing is the one step that turns a recoverable boot loop into permanent data loss, and it is almost never necessary. If an installer offers to erase, stop and copy your files off first.
- Start in Recovery using the method for your Mac above.
- Choose Reinstall macOS and click Continue.
- When asked where to install, select your existing startup disk — do not erase it first.
- Leave the Mac plugged in and let it run. It will restart on its own more than once, and the progress estimate is unreliable.
If the installer refuses because it cannot find a valid volume, stop here and go to the next step rather than accepting an offer to erase.
6. Copy your files off before you erase anything
If nothing above has worked, copy your data off the machine before considering an erase and reinstall. Recovery gives you a way to do this without a working system, by turning the broken Mac into an external drive for a moment.
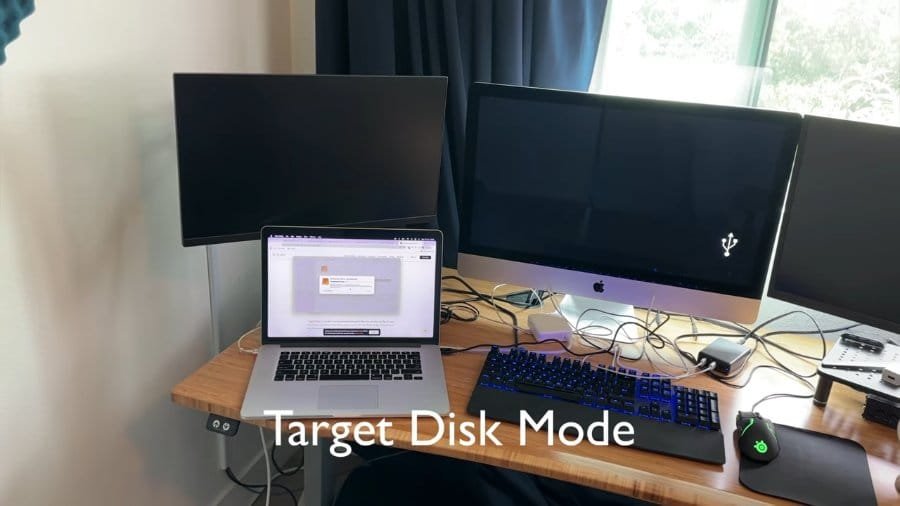
Apple silicon: in Recovery, open Utilities → Share Disk, then connect the Mac to another Mac with a USB-C or Thunderbolt cable and mount it from the other machine’s Finder.
Intel: use Target Disk Mode — shut down, then start up while holding T, and connect the two Macs with a Thunderbolt cable. A USB-C connector by itself does not guarantee that the cable supports Target Disk Mode.
If FileVault is on, you will be asked for the password or recovery key, which is a good reason to know where that key is before you need it.
When this is probably a hardware problem
Hand it to Apple or a repair shop if any of these are true:
- The Mac never reaches the Apple logo, or shows no image at all.
- You hear repeated startup chimes, or see a flashing folder with a question mark after trying Recovery.
- Disk Utility cannot see the internal disk at all — that points at hardware, not software.
- First Aid reports errors it cannot repair, and reinstalling fails.
A disk that has disappeared from Disk Utility entirely is the clearest sign that this has stopped being a software problem.
Once the Mac is working again
Most boot loops trace back to one of three things: an interrupted macOS update, a third-party system extension, or a disk that was already failing quietly. A Time Machine backup on an external drive covers all three, because whichever one happens, you’re just annoyed instead of wiped out. If you are running macOS on an unsupported Mac, take backups more seriously still — the usual update path is the exact moment these machines break.