Rectangle is a free, open-source app that snaps and arranges windows on your Mac. You can drag a window to an edge or corner and it fills that half, third or quarter of the screen — which makes a Mac feel a lot more like Windows — or you can do it all from the keyboard. I use it across three monitors, and the setup at the end of this guide — single function keys that throw windows between displays — is the part I’d set up first.
My video was recorded on macOS Sonoma with Rectangle 0.75. The current version of Rectangle needs macOS 14 Sonoma or later (older releases are available for older Macs), and the steps below still apply on Sequoia and Tahoe. If you’re on Sequoia or later, read the section on macOS’s own window tiling first.
- Download Rectangle from rectangleapp.com (or run
brew install --cask rectangle) and open it. - Allow it under System Settings → Privacy & Security → Accessibility, then restart your Mac.
- With more than one monitor, turn off Displays have separate Spaces in Desktop & Dock.
- Drag a window to an edge or corner to snap it, or use the keyboard shortcuts listed in Rectangle’s settings.
- Optional: map your most-used actions to single function keys.
Rectangle or the tiling built into macOS?
Since macOS Sequoia, your Mac has basic window tiling of its own: drag a window to the left or right edge to fill that half, hover over the green button for layouts, or use Fn-Control-arrow keys. Apple’s guide to tiling windows on Mac lists them all. If halves, quarters and full screen are all you need, you might not need anything else.
Rectangle still does more: thirds, more snap areas, a shortcut to throw a window to your next display, and shortcuts you can set to anything you like. That last one is why I keep using it.
If you use both, they’ll both react when you drag a window to an edge, so pick one for dragging. To let Rectangle handle it, go to System Settings → Desktop & Dock, scroll to Windows, and turn off Drag windows to left or right edge of screen to tile and Drag windows to menu bar to fill screen (Apple’s tiling settings). Or keep Apple’s dragging and turn off Snap windows by dragging in Rectangle’s settings, and use Rectangle only for keyboard shortcuts.
Install Rectangle
Download Rectangle for free from rectangleapp.com and drag it into your Applications folder. If you use Homebrew, brew install --cask rectangle does the same thing. There’s also a paid Rectangle Pro with extra features, but everything in this guide is in the free version.
When you open it, Rectangle needs permission to move other apps’ windows. Go to System Settings → Privacy & Security → Accessibility and make sure Rectangle is switched on.
If you have more than one monitor, go to System Settings → Desktop & Dock, scroll down to Mission Control, and turn off Displays have separate Spaces. This will save you some headaches when maximizing windows. It requires logging out to take effect.
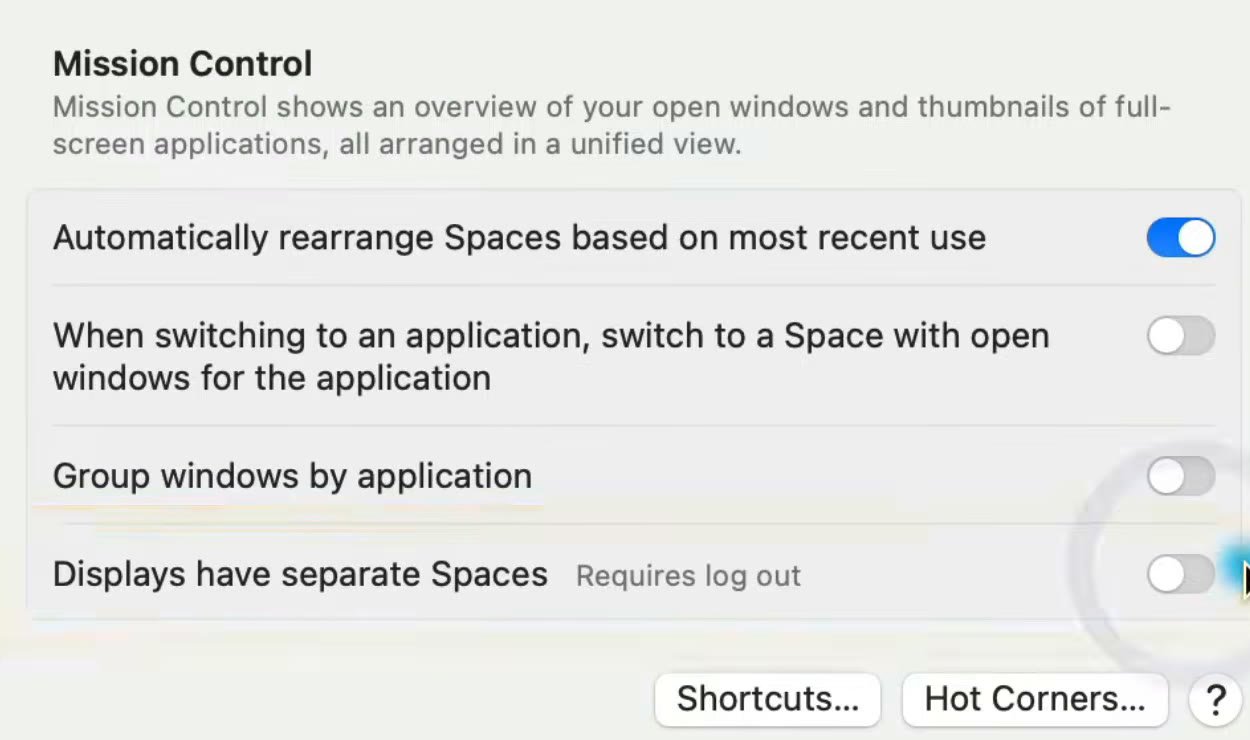
After the first install, it’s a good idea to restart your Mac — otherwise the default keyboard shortcuts may not load properly. Rectangle lives in the menu bar at the top of your screen, and you can click any action in its menu to move the current window.
Snap windows by dragging
With Rectangle running, you can drag windows to snap points on each monitor:
- Top edge: maximize, just like on Windows.
- Left or right edge: left or right half.
- Corners: a quarter of the screen.
- Bottom left, bottom middle, bottom right: left, center or right third.
The thing to remember is that your mouse pointer’s position decides where the window snaps, not the position of the window itself. It takes a little practice to find the snap points, especially across multiple monitors, but once you get the hang of it, it feels like a built-in part of macOS.
The snap points stay where they are, but you can change what each one does. Open Rectangle’s preferences from its menu bar menu and click the middle tab.
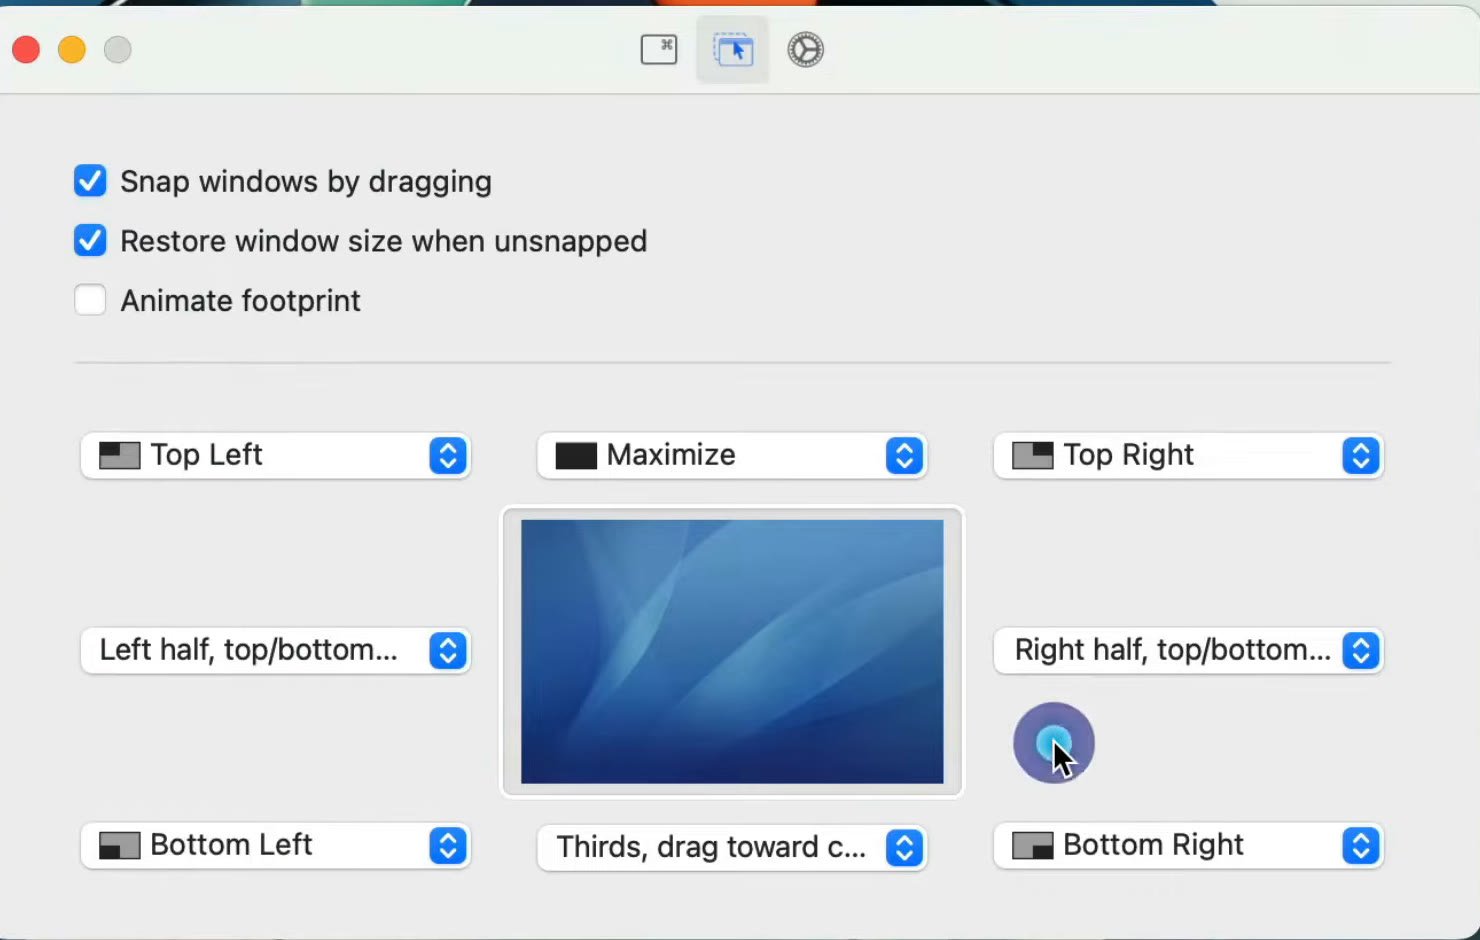
While you’re in settings, click the gear tab and check Launch on login if you plan to use Rectangle regularly.
Learn the keyboard shortcuts
The first tab in Rectangle’s settings lists every keyboard shortcut. There are actually two default sets: Spectacle — named after the app Rectangle evolved from, and the default when I installed it — and Rectangle. To switch, click the gear tab, then Restore Default Shortcuts & Snap Areas, and pick one.
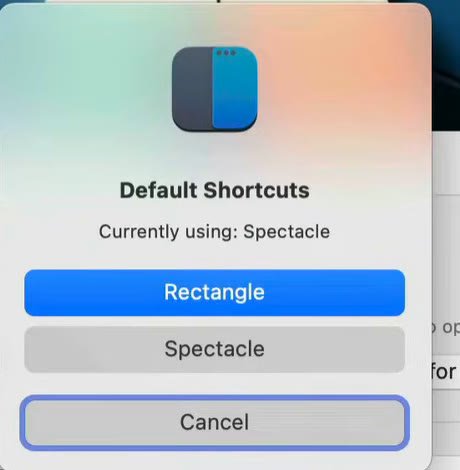
Most of the Spectacle defaults combine Command, Option, Control and the arrow keys:
| Action | Shortcut |
|---|---|
| Left or right half | Command-Option-Left/Right Arrow |
| Top or bottom half | Command-Option-Up/Down Arrow |
| Maximize | Command-Option-F |
| Next or previous display | Command-Option-Control-Right/Left Arrow |
| Top left or top right | Command-Control-Left/Right Arrow |
| Bottom left or bottom right | Command-Control-Shift-Left/Right Arrow |
One of my favorite uses of Rectangle is sending the current window straight over to another display. But those four-key shortcuts get your fingers twisted pretty quickly, so here’s what I actually do.
My setup: windows on single function keys
Most Macs have a few function keys you never use. I map the actions I use most onto them, and leave F2 free for now:
- F3: left half
- F4: right half
- F5: previous display
- F6: next display
In Rectangle’s shortcuts tab, click the shortcut field next to an action and press the key you want.
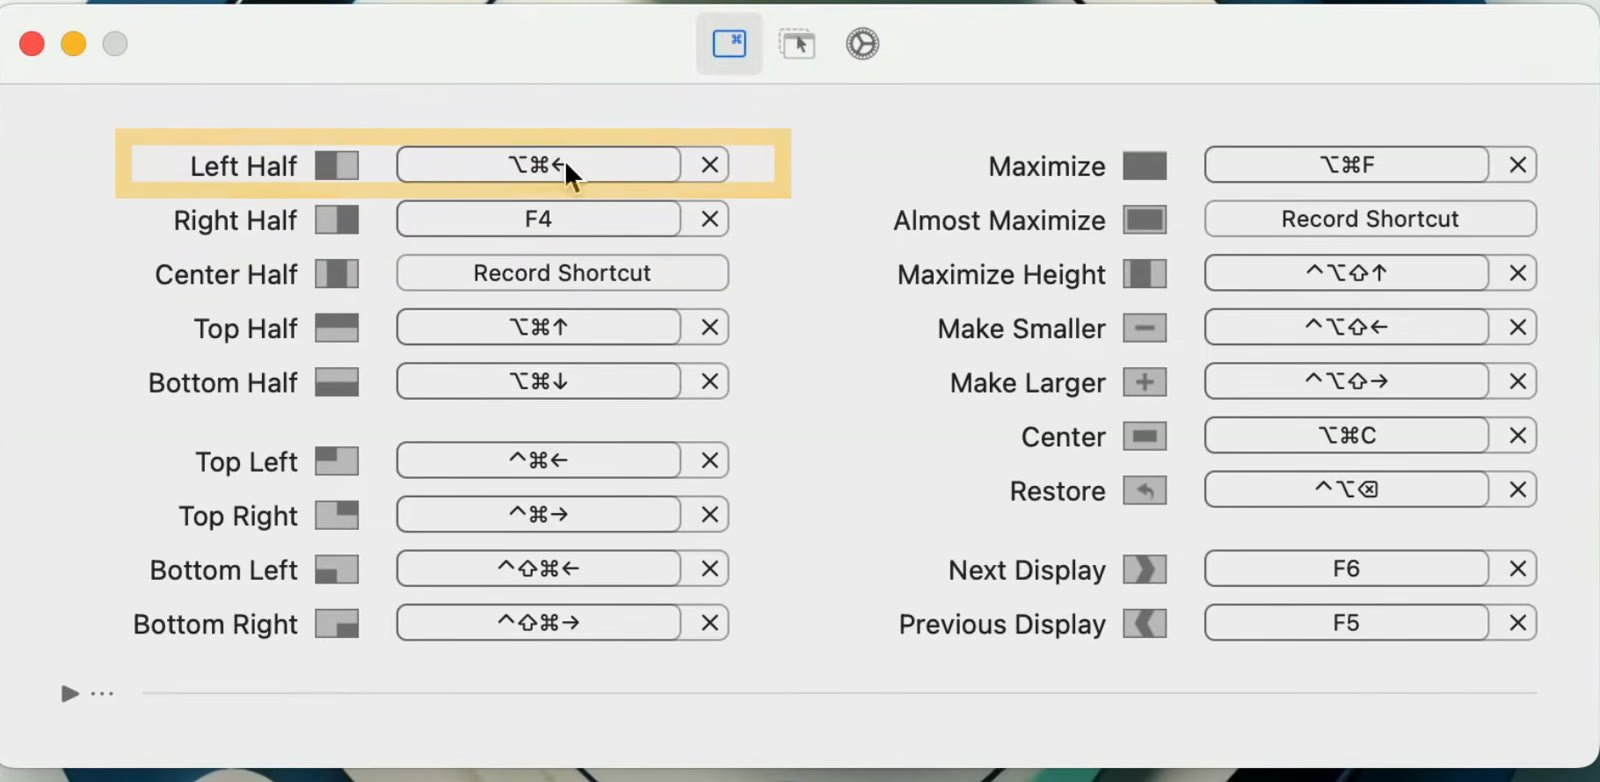
Now one key splits the screen or sends a window to the display on its left or right. Press F6 twice and a window from my middle monitor ends up on the right-hand one. Honestly, I hope that alone makes this worth setting up for you.
A couple of things to watch for, the same ones I mention in my one-key screenshot guide. If your top-row keys control brightness and volume, either hold fn with them or turn on Use F1, F2, etc. keys as standard function keys in System Settings → Keyboard. And don’t use a key another app has already claimed — if you’ve set F5 for screenshots, pick a different key here.
Bonus: pop a Chrome tab into its own window with F2
Here’s the one that pulls it all together. Chrome has a menu command to pull the current tab out into a new window, and macOS lets you give any menu command a keyboard shortcut.
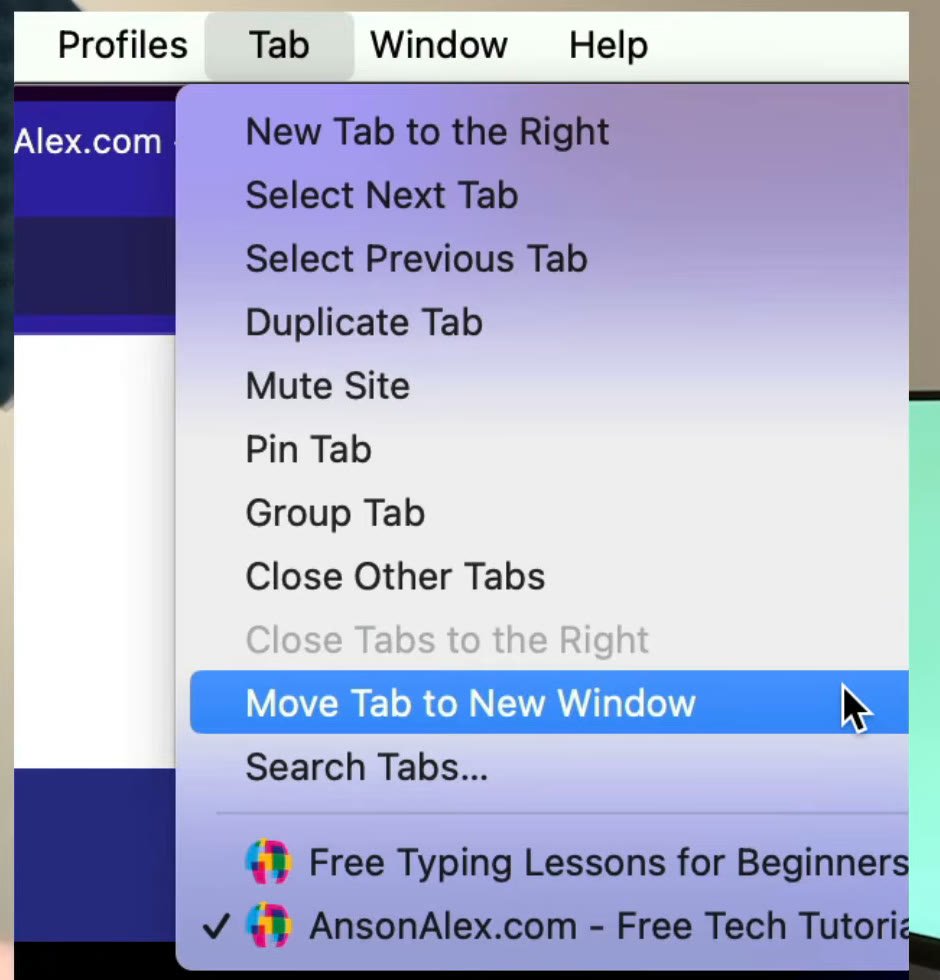
Go to System Settings → Keyboard, click Keyboard Shortcuts, and choose App Shortcuts. Click the + button, pick Google Chrome as the application, and type Move Tab to New Window as the menu title — exactly as it’s written in Chrome’s Tab menu, because it’s case sensitive. Set the shortcut to F2 and click Done.
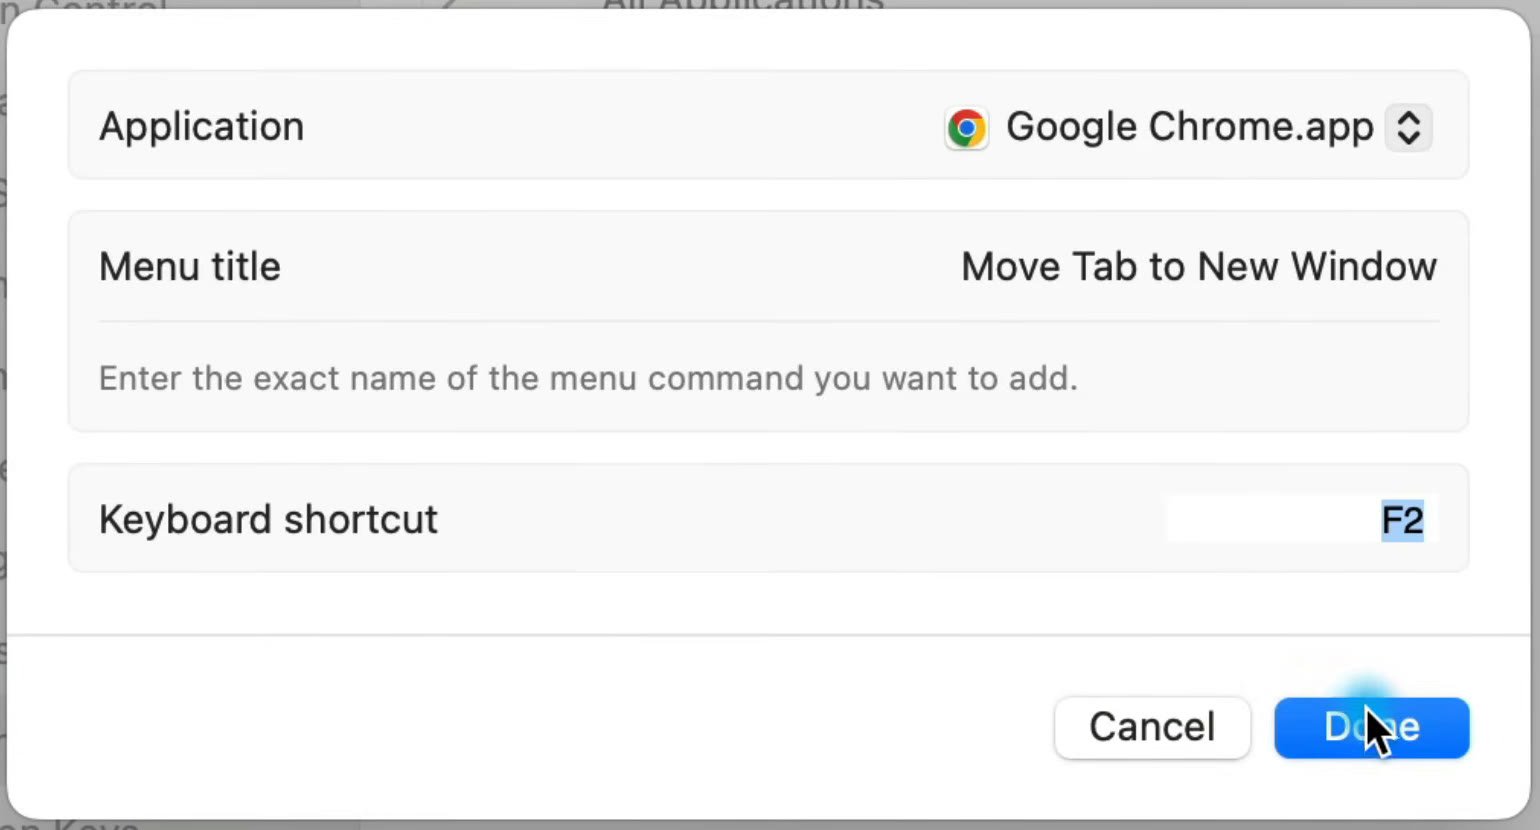
Now when I find something I want to compare side by side, I press F2 to pop the tab out, F5 or F6 to send it to another monitor, or F3 and F4 to put two windows side by side. This works with other browsers too, as long as they have a menu command for moving a tab to a new window — just type the menu title exactly as that browser writes it.
If you’re new to Mac and want the basics first, my macOS beginner guide covers window buttons, full screen and the other shortcuts worth knowing.