Last updated December 2025
Quick heads-up: If your goal is the newest usable macOS on an older Intel Mac, you should almost always install macOS Sequoia instead of Sonoma in 2026. Sonoma is still useful in specific situations (older hardware, certain apps, or if Sequoia isn’t ideal for your exact model), but Sequoia is the primary “modern unsupported macOS” path that I actively maintain.
TL;DR — Fast Overview
- Best choice for most people in 2026: Sequoia (use the guide above).
- If you specifically need Sonoma: Follow the steps below with OpenCore Legacy Patcher.
- Use a 32GB+ USB drive for the installer (reduces avoidable installer/space issues).
- After any macOS update: re-run Post-Install Root Patch.
- Big “don’t mess this up” rule: When OCLP asks where to install OpenCore, choose the USB during installer creation — then choose your internal drive after Sonoma installs.
Important Note About macOS Tahoe
Many people searching right now are trying to jump directly to macOS Tahoe on older Intel Macs. Here’s the reality as of early 2026: Apple’s macOS Tahoe is widely reported as the final major macOS release to support Intel Macs, and Intel support is limited to only a small set of late Intel models.
On top of that, OpenCore Legacy Patcher does not currently offer a stable, recommended “Tahoe on unsupported Intel Macs” path for real-world daily systems, and community reports regularly describe machines breaking after accidentally updating to Tahoe. That’s why this guide focuses on the practical targets: Sequoia (preferred) or Sonoma.
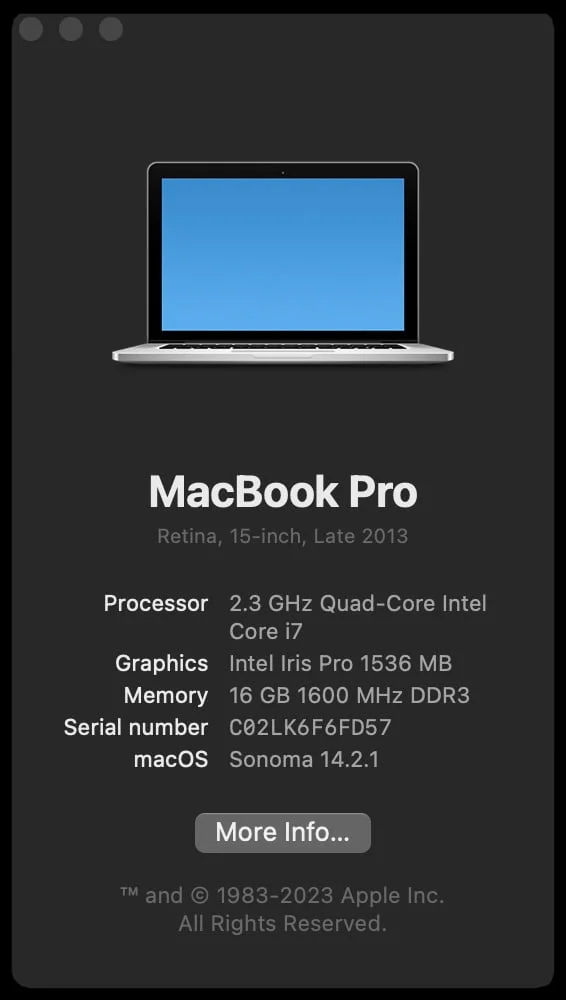
Upgrading an older Mac to a newer macOS can breathe new life into your device. While my late 2013 MacBook Pro is technically unsupported for upgrading to macOS Sonoma, I’ve decided to go for it anyway and am happy to share my method. This process involves creating your own installer, so let’s dive in.
Before You Begin (Please Don’t Skip)
OpenCore Legacy Patcher (OCLP) can make unsupported macOS installs surprisingly reliable — but the success rate comes down to preparation and avoiding a few common mistakes.
- Make a full backup first. Time Machine is fine, but a full-disk backup is even better. If anything goes wrong, your backup is what saves your day.
- Update your current macOS first (recommended). Do a normal update from System Settings → General → Software Update before you attempt the major upgrade. This reduces installer weirdness and patching issues.
- Use a 32GB+ USB drive. Yes, Sonoma installers can sometimes fit on smaller drives, but 32GB+ avoids avoidable failures and confusion.
- Unplug other external drives while doing this. This dramatically reduces the chance of selecting the wrong disk.
- Keep laptops plugged into power for the entire process.
If you want a quick refresher on erase/format options, here’s my tutorial: Disk Utility for macOS tutorial.
Preparing the Installer
First, you’ll need a USB drive with 32GB or more of space. Once you have your USB drive ready, follow these steps to create the macOS Sonoma installer.
Important: During this process, OCLP will erase the USB drive. Copy anything important off it first.
- Confirm your model is supported: OpenCore Legacy Patcher supports many Intel Macs, but not all. Check the official supported model list and the Sonoma notes.
- Download OpenCore Legacy Patcher: Go to the official documentation site and use it to understand current behavior, known issues, and what “root patching” does on your model.
- Download the latest OCLP app: From the official releases page, download
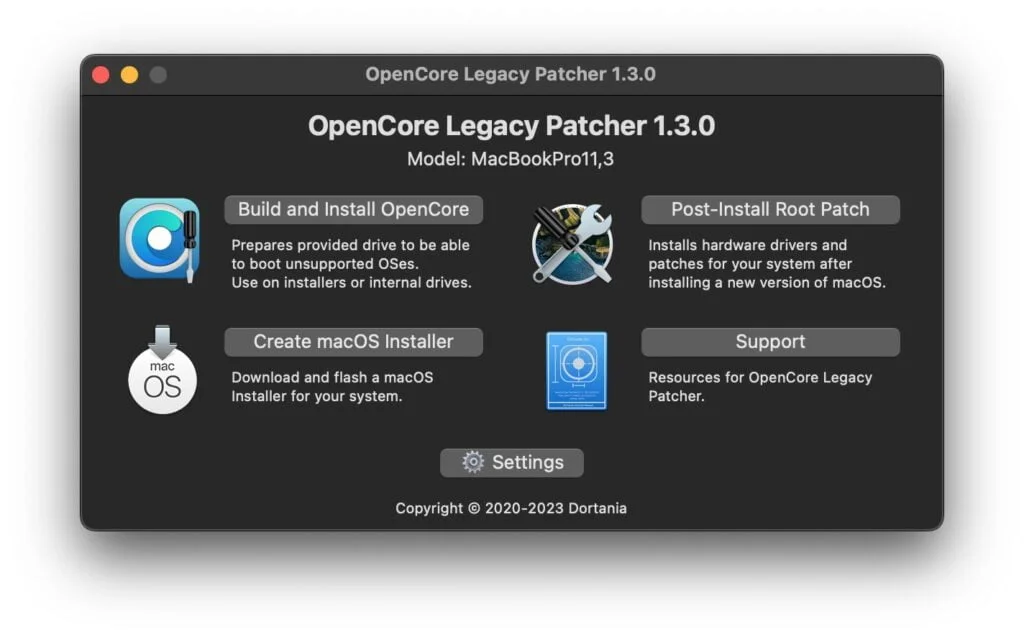
OpenCorePatcherGUI.app.zip(even if you installed OCLP in the past). - Open OCLP and create the macOS installer:
- Unzip and open OpenCore Legacy Patcher.
- If macOS blocks it, go to System Settings → Privacy & Security and click Open Anyway.
- Choose Create macOS Installer → then Download macOS Installer → choose macOS Sonoma.
- When asked to create the installer, choose Yes and select your USB drive.
- Install OpenCore to the USB (critical step):
- After the installer is built, OCLP will ask to install OpenCore to disk.
- Choose Yes, then select the USB drive (not your internal Macintosh HD).
- This is what makes the USB bootable with OpenCore so the installer can run on unsupported Macs.
Most common mistake right here: selecting the internal drive instead of the USB when OCLP asks where to install OpenCore. If you’re unsure, stop and confirm the disk name before clicking install.
Installing macOS Sonoma
Once your USB installer is ready (with OpenCore installed onto the USB), it’s time to boot from it and install Sonoma.
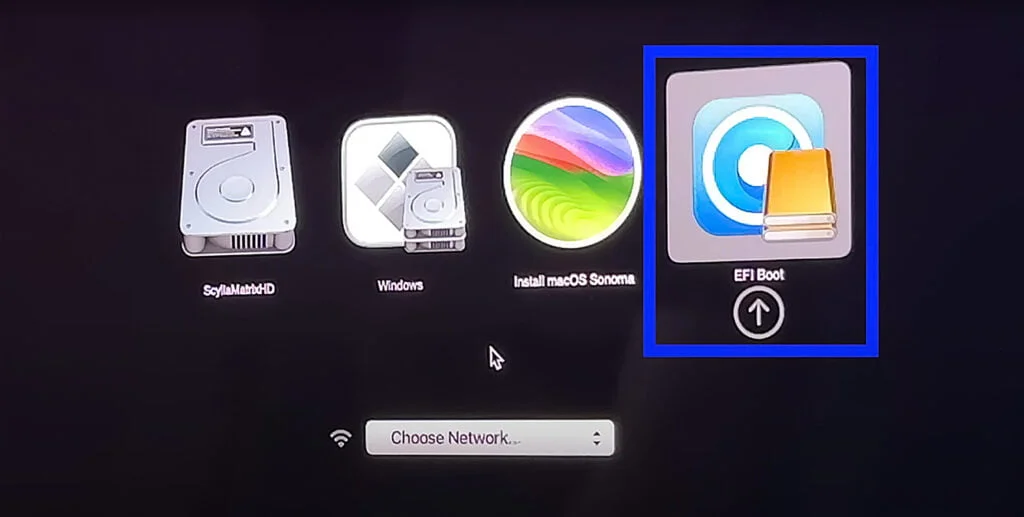
- Boot from USB: Restart your Mac and immediately hold Option (⌥) to open the boot picker. Select the EFI option (OpenCore on the USB), then choose Install macOS Sonoma from the OpenCore menu.
- Disk Utility (optional, but best for long-term stability): If you want the cleanest install, open Disk Utility and erase your internal disk first. Use APFS. Make sure your backup is done before erasing anything.
- Install macOS Sonoma: Follow the on-screen prompts, agree to the license, select your internal drive, and start the install.
- Be patient during reboots: Your Mac will reboot multiple times with different progress screens. This is normal. The full install can easily take 30–60 minutes depending on your Mac and storage speed.
- After Sonoma boots, install OpenCore to your internal drive:
- Once you reach the desktop, OCLP will typically warn that you’re booting from the USB and should install OpenCore to the internal disk.
- Choose Install OpenCore to Disk and this time select your internal drive (the one Sonoma is installed on), then select the EFI partition.
- Reboot when prompted.
- Run Post-Install Root Patch (required on many Macs):
- Open OCLP → choose Post-Install Root Patch → Start Root Patching.
- When it finishes, eject your USB drive.
- Reboot to apply the patches.
Why root patching matters: this is the step that commonly restores key hardware support (graphics acceleration, Wi-Fi/Bluetooth behavior, etc.) on many older Macs. If you skip this, the system may feel slow or broken.
Common Problems & Fixes (Real-World Stuff)
Most “failed installs” are actually one of these issues. Here’s what to check first.
- Boot loop after install: Boot back into OpenCore from the USB (Option → EFI), then open OCLP and run Post-Install Root Patch again. Missing root patches are a very common cause.
- Black screen or weird graphics: Re-run root patching. Sonoma graphics support varies by GPU and model, so also review Sonoma’s known issues list for your generation.
- Wi-Fi or Bluetooth missing: Re-run root patching first. If Bluetooth is flaky on older models, an NVRAM reset is sometimes mentioned as a workaround in the Sonoma notes.
- Installer freezing or failing: Make sure you updated your current macOS first, keep the Mac on power, and ensure you have plenty of free storage. Also, use a different USB drive if yours is old or unreliable.
- Accidentally updated to Tahoe / major upgrade you didn’t want: Turn off automatic major upgrades and be careful with Software Update prompts. People commonly report problems after an accidental Tahoe jump on unsupported systems.
- Chose the wrong disk during “Install OpenCore to Disk”: If you’re ever unsure, stop. During installer creation, OpenCore goes to the USB. After Sonoma installs, OpenCore goes to the internal drive.
Future Sonoma Updates (2026+)
You can usually install incremental Sonoma updates via System Settings → General → Software Update, but on unsupported Macs updates often take longer. After every update:
- Open OpenCore Legacy Patcher
- Run Post-Install Root Patch again
- Reboot
Tip: Consider disabling automatic major upgrades so your Mac doesn’t attempt to jump to a newer macOS version that isn’t realistic for your machine.
Should You Install Sonoma in 2026… or Jump to Sequoia?
If your Mac can run Sequoia well with OCLP, Sequoia is the better long-term move. Sonoma is still a solid “modern macOS” option, but Sequoia is where most of the current OCLP attention is now — especially with Intel support narrowing in newer macOS versions.
Final Touches
Upgrading an unsupported Mac to macOS Sonoma is extremely rewarding and can add years of usable life to your machine.
Before installing any future updates, always check the OCLP notes for known issues. After each update, re-run Post-Install Root Patch.
Remember: always back up your data before upgrades.
Reference Links
- My main guide: Install macOS Sequoia on Unsupported Macs (2026)
- Dortania: OpenCore Legacy Patcher Documentation
- Dortania: macOS Sonoma notes (issues + status)
- OCLP GitHub Releases (download the latest app)
- Apple: macOS compatibility information
- Apple: macOS Tahoe page
If your Mac supports Sequoia, I strongly recommend upgrading to it next: