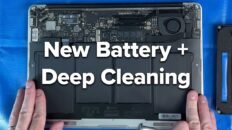
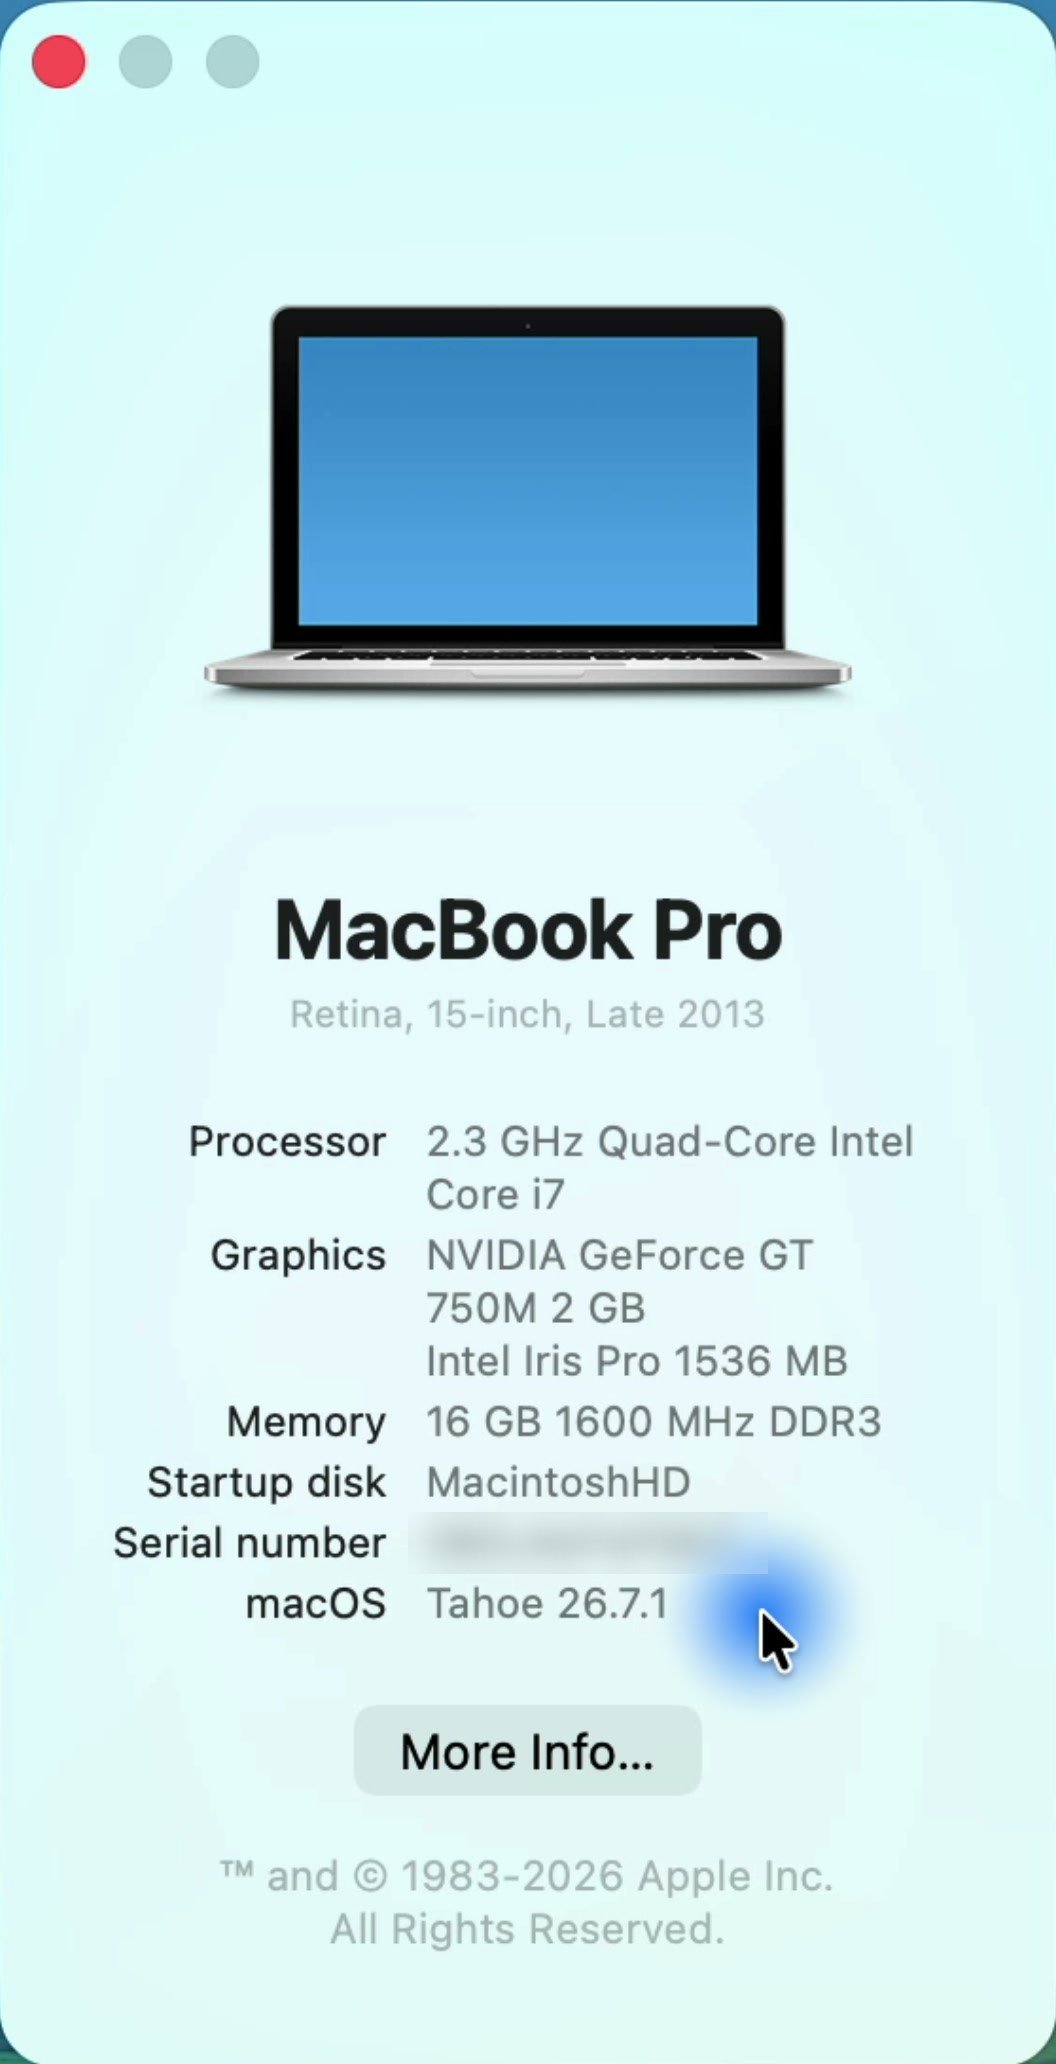
macOS Tahoe 26 is the last version of macOS that will ever support Intel Macs, and my late-2013 MacBook Pro is still officially unsupported. But you know me. I did Sonoma, I did Sequoia, and now I’ve installed macOS Tahoe 26.7.1 on it with OpenCore Legacy Patcher 3.0. It took me about two hours, and it’s running even better than Sequoia did.
Before you start: OpenCore Legacy Patcher (OCLP) 3.0 is still a prerelease — version 3.0.0 RC3 as I write this. Back up your files, check your exact model, and don’t do this on a Mac you depend on. Macs with a T2 chip can’t install it yet.
Tested October 12, 2026 on a MacBook Pro (Retina, 15-inch, Late 2013), model MacBookPro11,3, upgrading from an OCLP install of Sequoia. Clean install, OCLP 3.0.0 RC3, macOS Tahoe 26.7.1 (25G241).
- Back up, confirm your model is supported, and plan a way to get online without Wi-Fi.
- Download OpenCore-Patcher.pkg from the OCLP 3.0.0 release (not the “Latest” 2.x release) and install it.
- In OCLP, choose Create macOS Installer, download macOS Tahoe and build a 32GB+ USB installer.
- Install OpenCore to the USB drive, restart holding Option, and choose EFI Boot → Install macOS Tahoe.
- Erase the internal drive in Disk Utility (or skip this to keep your files), then install Tahoe.
- Get through Setup Assistant offline, get online by iPhone USB hotspot or Ethernet, and reinstall OCLP.
- Run Post-Install Root Patch, then install OpenCore to the internal drive and boot without the USB.
What you’ll need
- A compatible Intel Mac. Check it against Dortania’s supported models list before anything else.
- A 32GB or larger USB drive you don’t mind erasing. Speed matters more than size here: my 256GB PNY drive took about 38 minutes to build the installer. If you need one, USB 3.0 flash drives 32GB.
- A current backup. If you don’t have a backup drive yet, an external SSD for Mac backup is the simplest option. Those two are affiliate links — as an Amazon Associate I earn from qualifying purchases, at no extra cost to you.
- Your power adapter. Keep a laptop plugged in the entire time.
- A way to get back online without Wi-Fi. This is the one most guides skip, so read the next section.
Before you start
Check that your Mac can actually run it
Tahoe officially supports only a handful of Intel Macs (see Apple’s Tahoe compatibility list), so most Intel Mac owners reading this are in OCLP territory. According to Dortania’s Tahoe support tracker, there are still a few hard limits:
- T2 Macs (most Intel Macs from 2018 to 2020) still panic when booting through OpenCore and can’t reach the installer yet.
- Fusion Drive Macs: Apple removed Fusion Drive support from macOS, and the two halves show up as separate volumes.
- Graphics patches are available for the common older GPUs, including the Intel Haswell and Nvidia Kepler graphics in my 2013 MacBook Pro.
If your Mac isn’t covered, macOS Sequoia with OCLP is still the more mature option.
Plan a way back online
Here’s the part that caught me out. After a clean install, Tahoe’s Wi-Fi didn’t work on my Mac, and OpenCore Legacy Patcher wasn’t on the new system to fix it — the app was missing from Applications entirely. Wi-Fi only comes back after you reinstall OCLP and run its root patches, which means you need some other way to get online first:
- iPhone Personal Hotspot over a USB cable — what I used, and it worked immediately.
- Wired Ethernet, if your Mac has a port or you have a supported adapter.
- A copy of OpenCore-Patcher.pkg saved on another drive before you erase anything.
Check that one of these actually works with your setup before you erase your drive.
Step 1: Download OpenCore Legacy Patcher 3.0
Go to the OpenCore Legacy Patcher releases page on GitHub. The release marked Latest on the repository page was 2.5.1 for me, and that is not the one you want — it doesn’t support Tahoe. Open the release list and find the newest 3.0.0 release. For me that was 3.0.0-rc.3, marked Pre-release; there may be a newer one by the time you read this.
Expand Assets and download OpenCore-Patcher.pkg. You don’t need the Uninstaller or AutoPkg-Assets packages.
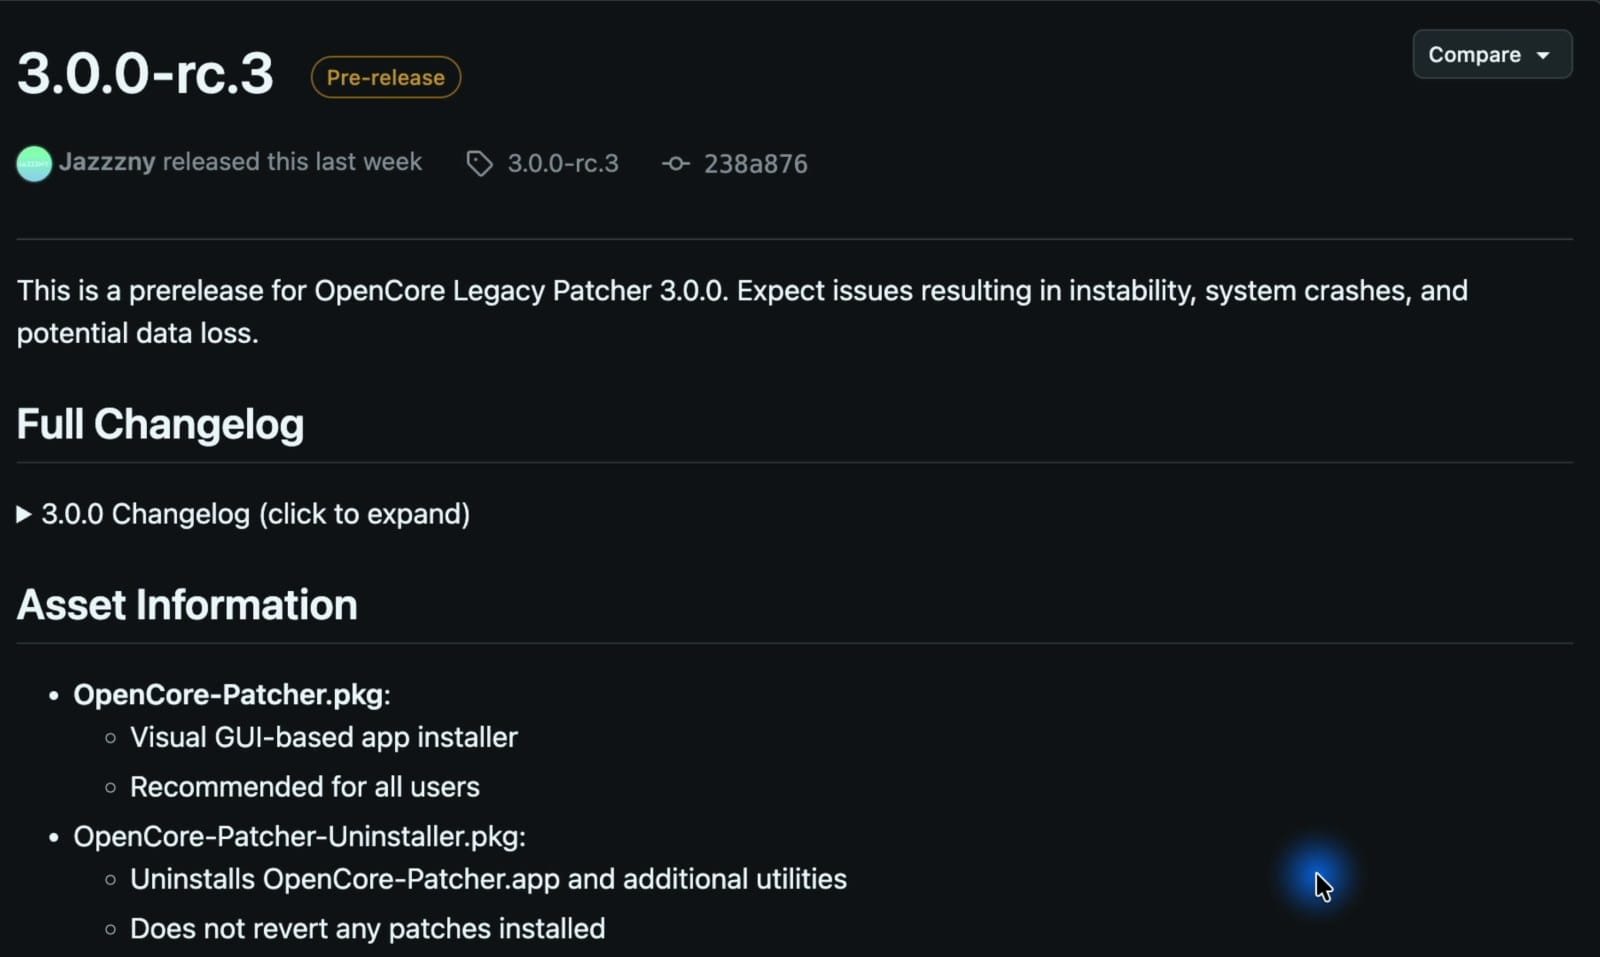
Open the package and click Continue through the installer to install it. Then open Applications → OpenCore-Patcher.
Step 2: Download the macOS Tahoe installer
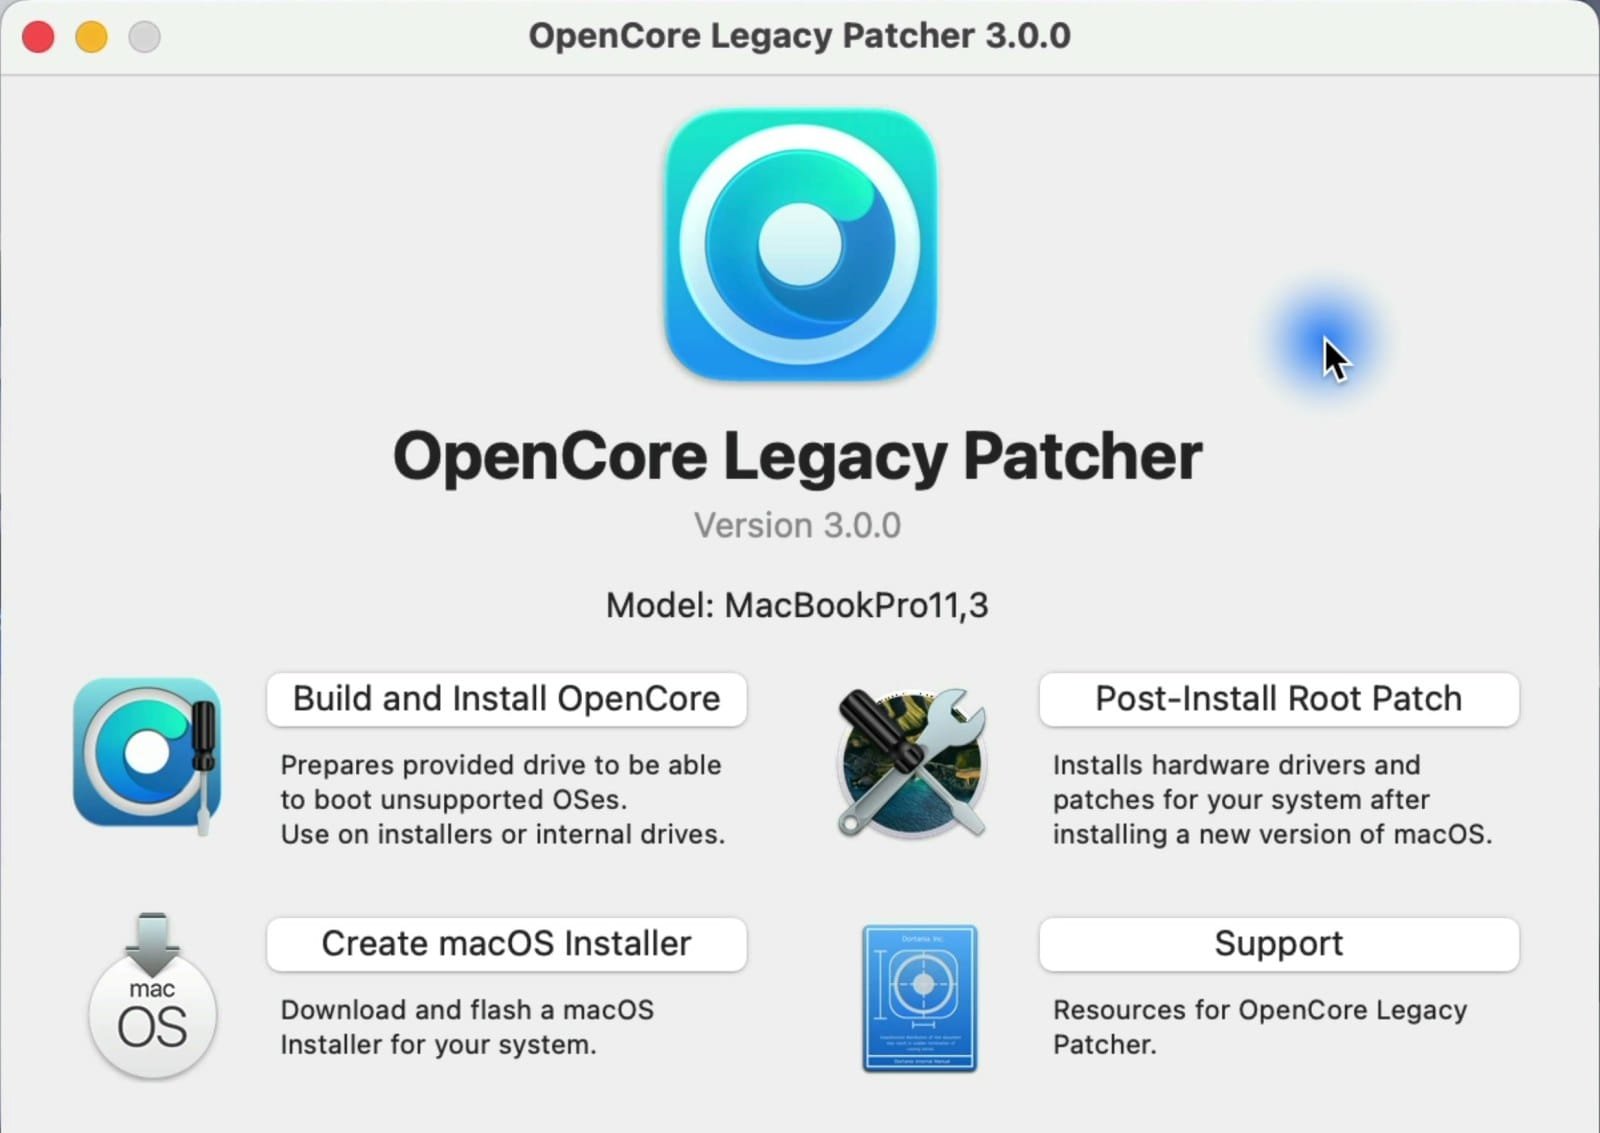
In OpenCore Legacy Patcher, the main window shows your Mac’s model identifier — mine is MacBookPro11,3. Click Create macOS Installer, then Download macOS Installer.
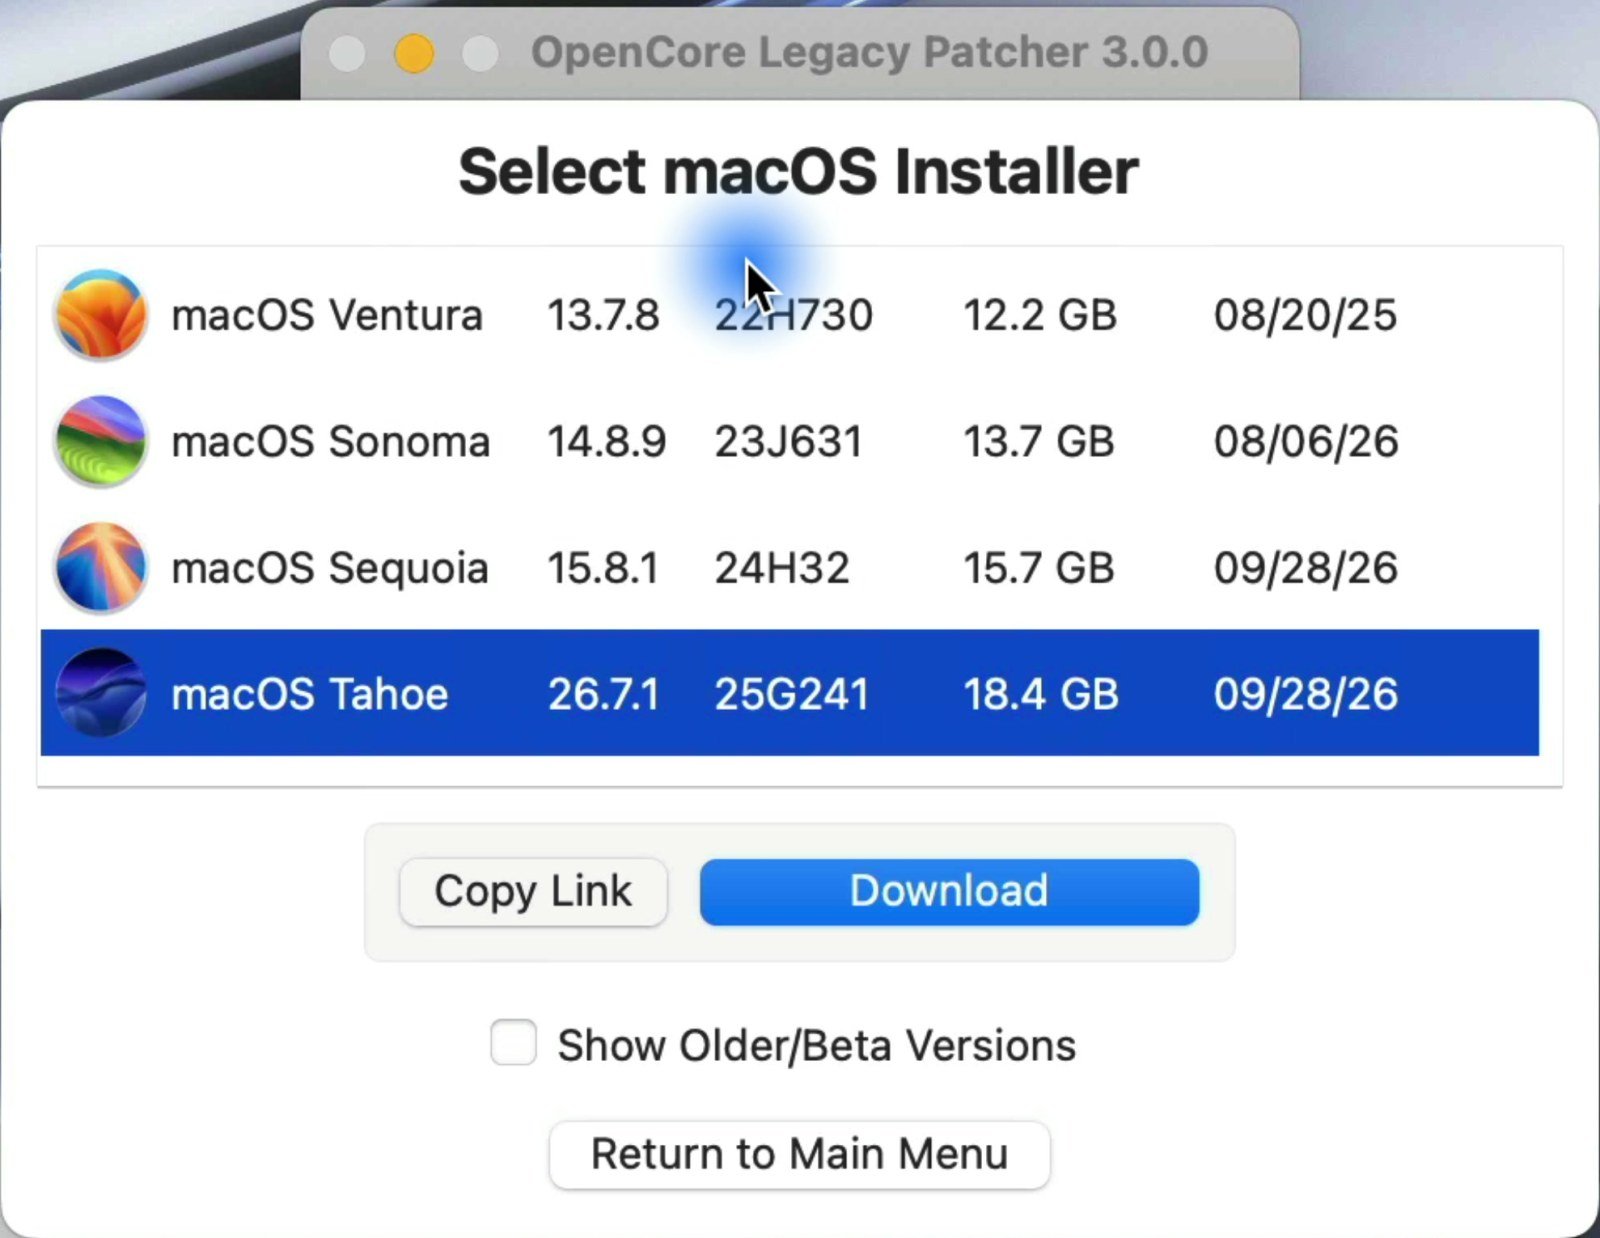
Select macOS Tahoe and click Download. For me it was macOS Tahoe 26.7.1, about 18.4GB, and it took about six minutes to download plus another two minutes to extract.
Step 3: Create the USB installer
Insert your USB drive. When OpenCore Legacy Patcher asks to create the installer, click Yes, choose the Tahoe installer you just downloaded, and then select your USB drive.
Double-check the disk here. Whatever you select will be erased. Unplugging any other external drives first makes it hard to get wrong.
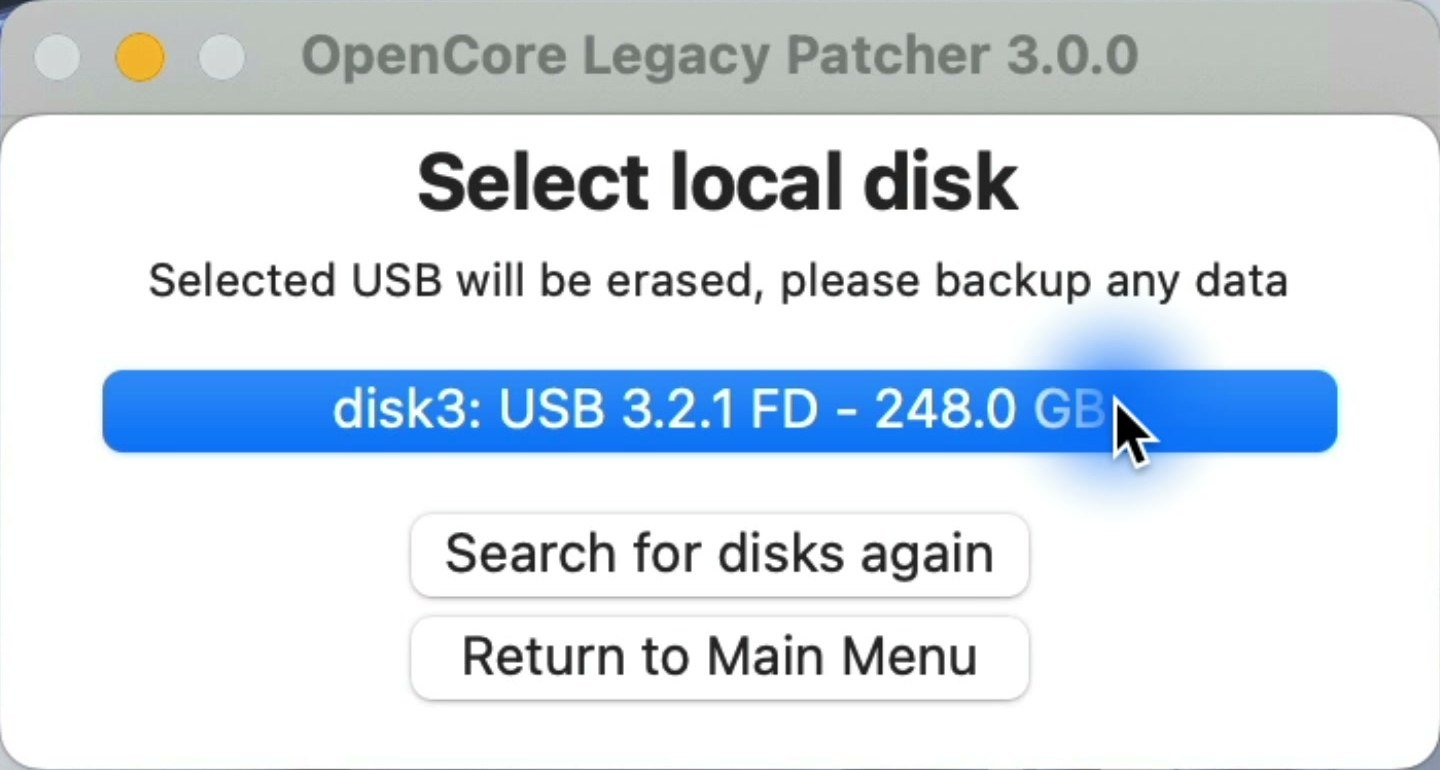
Confirm, and let OCLP copy and validate everything. OCLP itself warns that this can take 30 minutes or more on slower drives. My 256GB PNY drive spent about 35 minutes copying files and three more validating them — about 38 minutes total.
Step 4: Install OpenCore to the USB drive
When the installer is ready, OCLP offers to install OpenCore. Click Yes. It builds the OpenCore configuration for your model, then click Install to disk.
Now pay attention to the disk list. Choose your USB drive, not your internal SSD. The disk highlighted in blue is the one OpenCore is currently booting from — on my Mac that was the internal SSD from my old Sequoia install, which is exactly the one I didn’t want here.
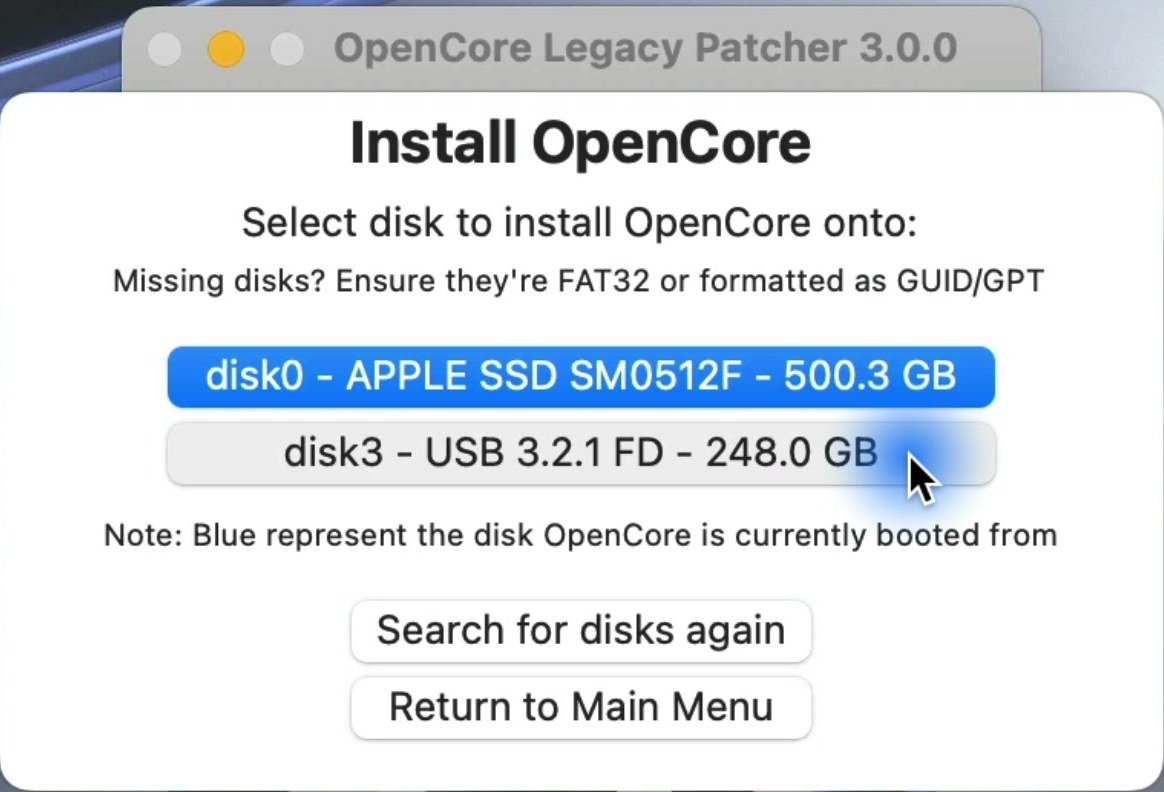
Select the USB drive’s EFI volume when asked. OCLP copies the bootloader onto that EFI partition (the small hidden boot volume), which took about a minute. When it finishes, click Reboot.
Step 5: Boot the Tahoe installer
As the Mac restarts, hold the Option (⌥) key until the startup picker appears. Select EFI Boot and press Return. On the next menu, select Install macOS Tahoe and press Return again.
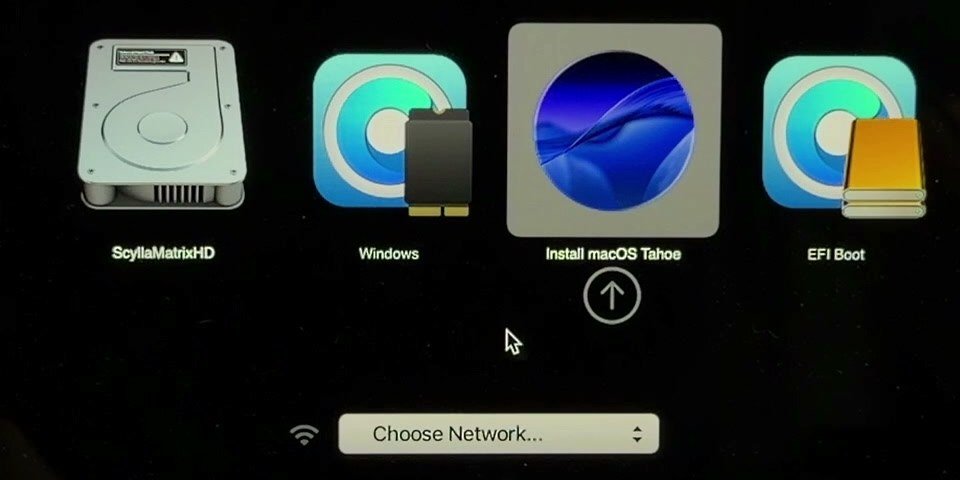
That loads the Tahoe installer and its recovery utilities. If the Mac boots straight back into your old macOS instead, restart and hold Option a little earlier.
Step 6: Erase the internal drive (clean install)
I did a clean install, which I’d recommend if you can. From the recovery utilities, choose Disk Utility and click Continue.
This step permanently erases your Mac’s internal drive. Make sure your backup is complete and that you’ve selected the internal drive, not the USB installer.
In the sidebar under Internal, select your Mac’s main drive at the top of the list (not the USB installer under External), then click Erase. Name it Macintosh HD, choose APFS, and click Erase.
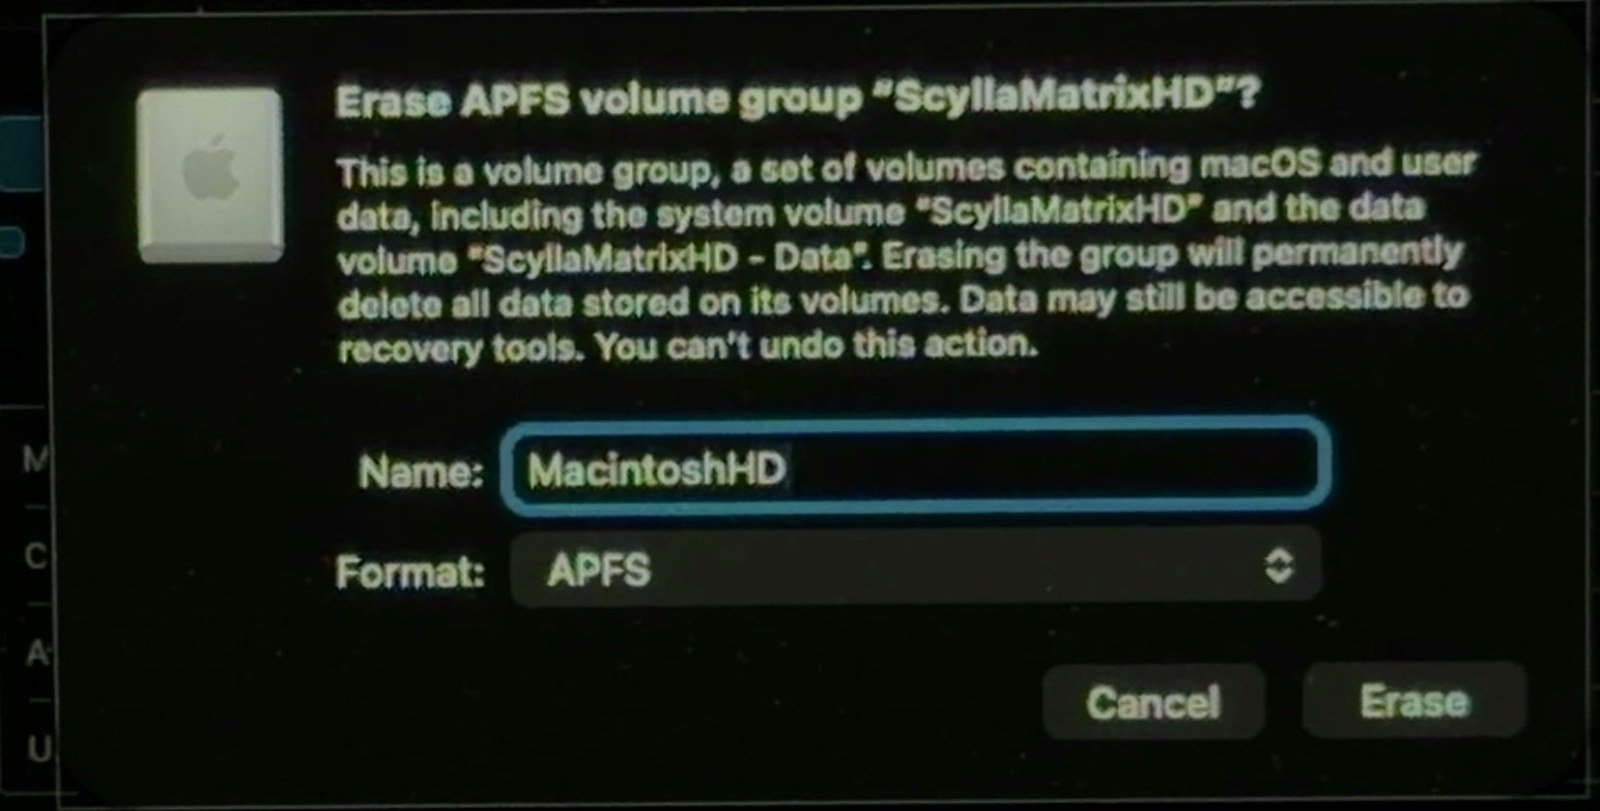
Because I erased the APFS volume group rather than the entire physical disk, my separate Boot Camp partition survived. If you use Windows in Boot Camp, that’s worth knowing before you choose what to erase. (The Disk Utility tutorial covers the difference.)
When it’s done, click Done and quit Disk Utility.
Want to keep your files instead? Skip Disk Utility and install Tahoe over your existing macOS volume. Make sure OpenCore Legacy Patcher is fully up to date on that volume before you do the upgrade, and expect a clean install to give you the cleaner result.
Step 7: Install macOS Tahoe
Back on the recovery menu, choose Install macOS Tahoe and click Continue.
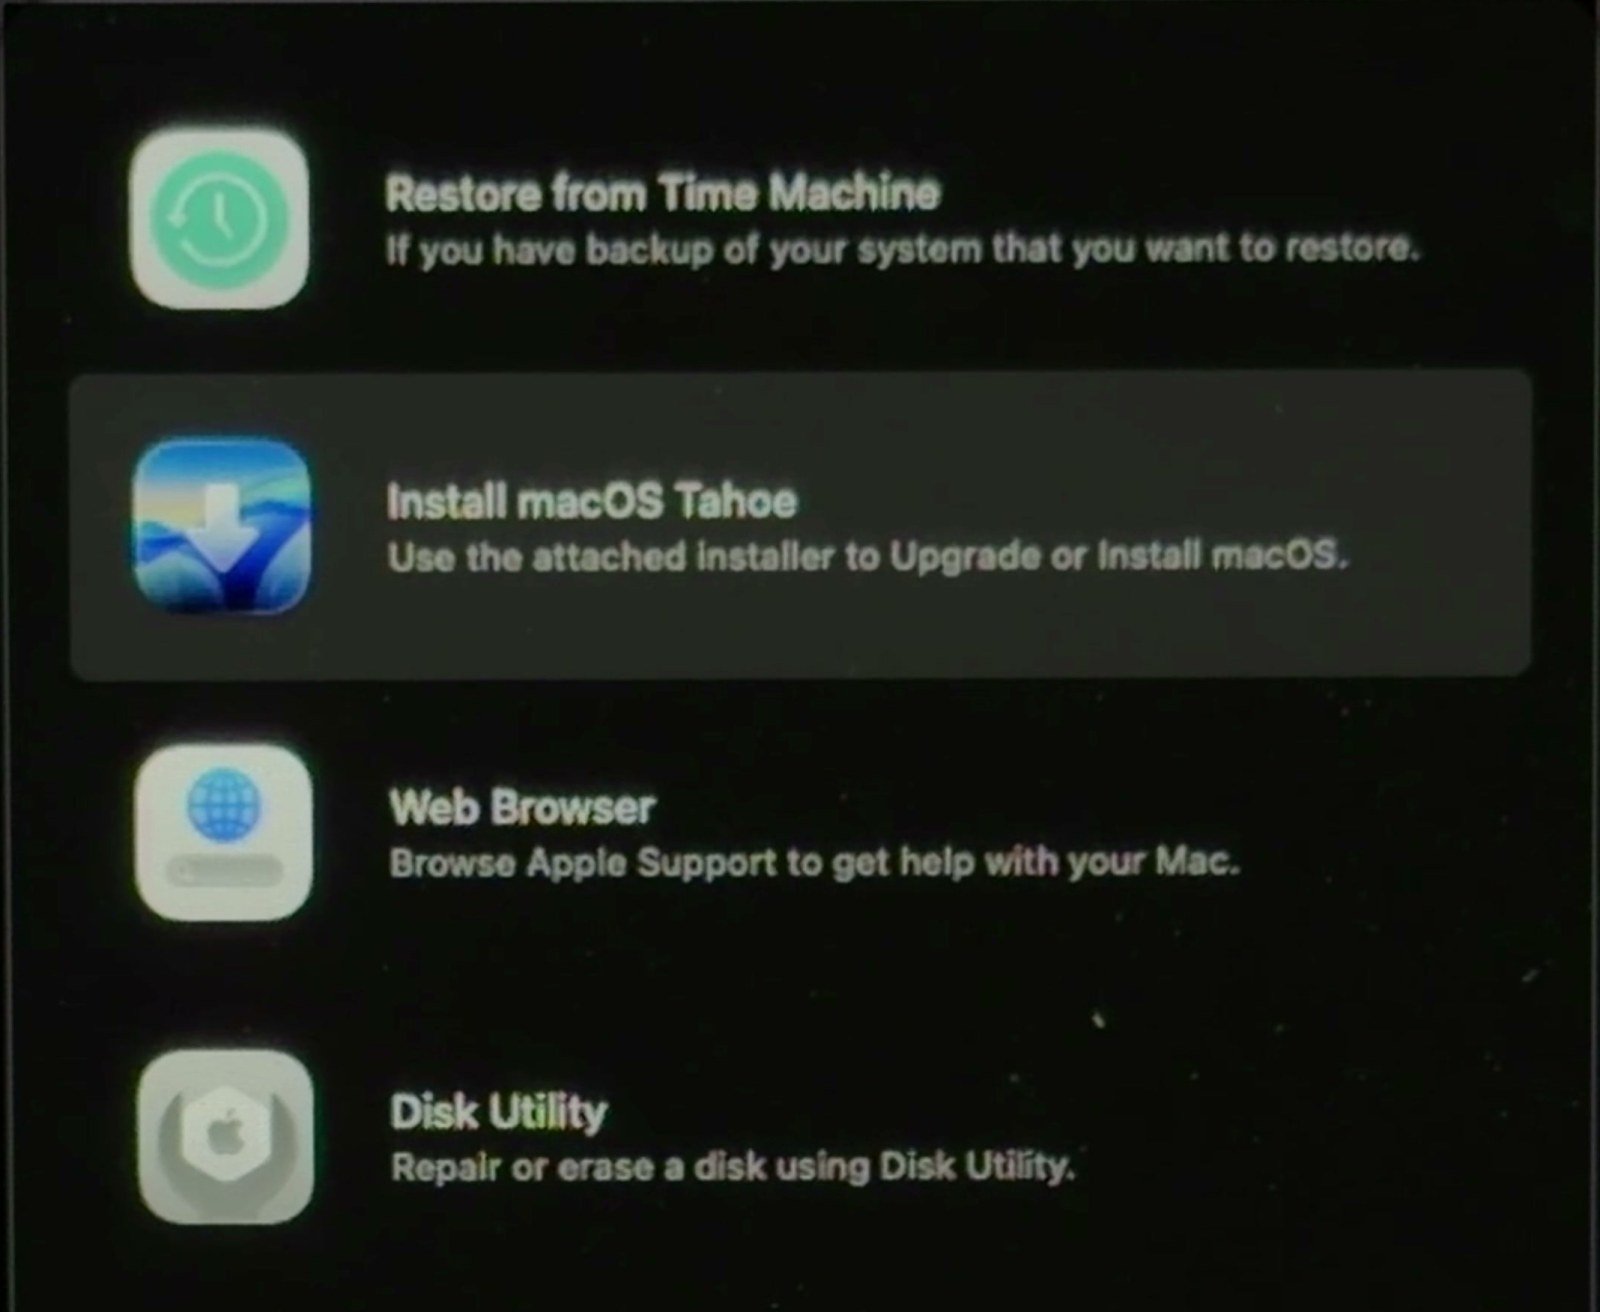
Agree to the license, select Macintosh HD, and click Continue to begin.
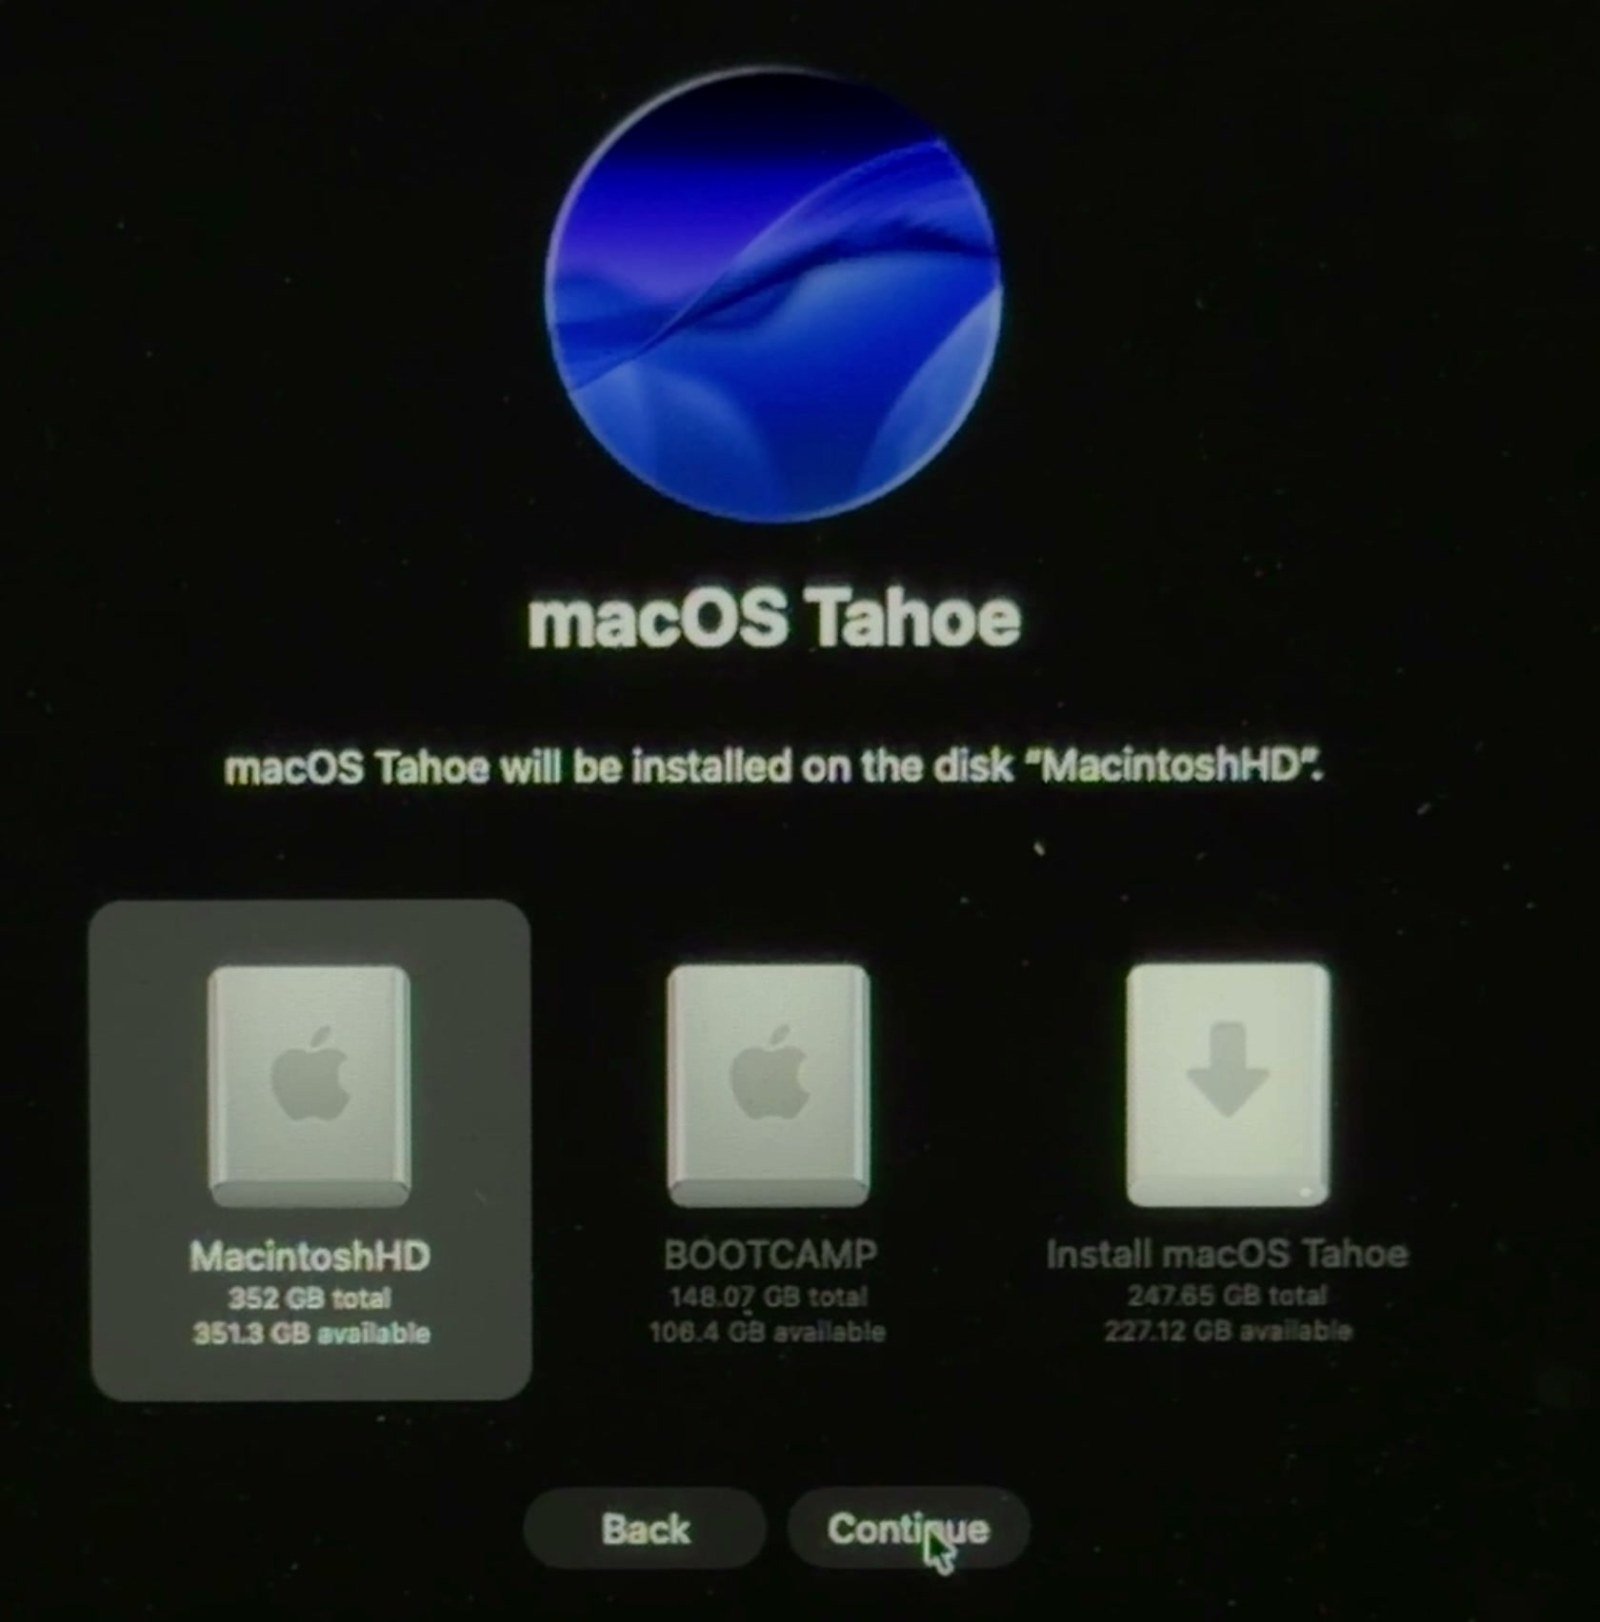
The installation took about 24 minutes on my Mac, with four automatic restarts. The time estimates jump around, so keep the USB plugged in and let it continue. You shouldn’t need to press anything.
Step 8: Get through Setup Assistant without Wi-Fi
When Setup Assistant appears, select your country, choose Set Up as New, and create your account.
At this point my mouse was really lagging and the Wi-Fi list was empty. That’s expected: the drivers for older Wi-Fi and graphics hardware haven’t been patched yet. Don’t reinstall anything. When the Wi-Fi screen appeared, I clicked Continue without choosing a network, clicked Cancel on the prompt asking me to join one, then Continue on the warning that the Mac couldn’t connect. Setup then carried on offline. The wording of those prompts may differ slightly on your Mac.
Going through the setup screens took me about 11 minutes, mostly because of the lag.
My setup then appeared to freeze on the Update Mac Automatically screen and stayed unresponsive for well over ten minutes. I’d read on Reddit that another user had to restart manually at this point, so I did: I held the power button to shut down, then restarted holding Option, chose EFI Boot, then Macintosh HD. It started up normally. Only force a restart like this if the Mac is genuinely unresponsive.
Step 9: Get online and reinstall OpenCore Legacy Patcher
You now have Tahoe installed, but you’re not done — Wi-Fi still doesn’t work and the system is sluggish until it’s patched.
Connect your iPhone with a USB cable and turn on Personal Hotspot on the phone. Your Mac should pick up an internet connection automatically. (Wired Ethernet works too.)
Once you’re online, go back to the OCLP 3.0.0-rc.3 release — or the newest 3.0 release — and download OpenCore-Patcher.pkg again. Double-click it to install it on your new Tahoe system.
Before root patching, Safari froze on me twice, especially when minimizing windows. I wouldn’t do much of anything until the root patches are installed.
Step 10: Run Post-Install Root Patch
Open Applications → OpenCore-Patcher, click Post-Install Root Patch, then click Start Root Patching. It lists the patches for your hardware; on my MacBook Pro that was Intel Haswell and Nvidia Kepler graphics, modern wireless, modern audio and the FaceTime camera.
Enter your password when asked. Root patching took about four minutes for me. When prompted, click Reboot. As the Mac restarts, hold Option, choose the USB’s EFI Boot, and then Macintosh HD again.
After that reboot, Wi-Fi worked, I could connect to my normal network, and the graphics were much smoother. This is also when my screen recording software finally worked again.
Step 11: Install OpenCore to the internal drive
You’re still booting from the USB stick at this point. OCLP will usually warn you about that on its own:
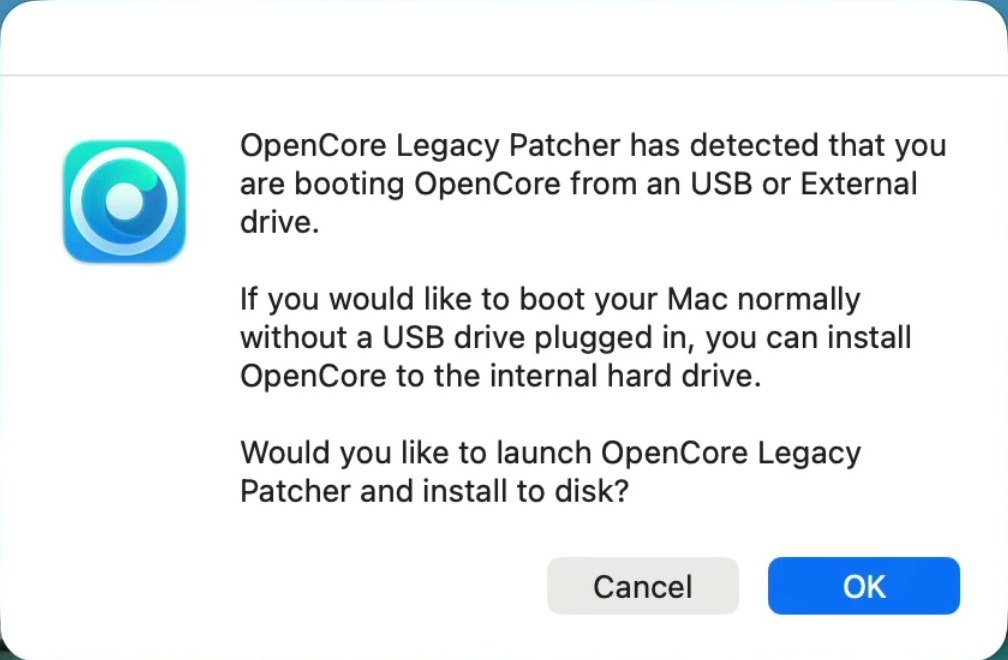
Click OK to let it build OpenCore, then click Install to disk. This time, select your internal Apple SSD — the big one; mine is about 500GB. Notice that the blue highlight has now moved to the USB, because that’s what you booted from.
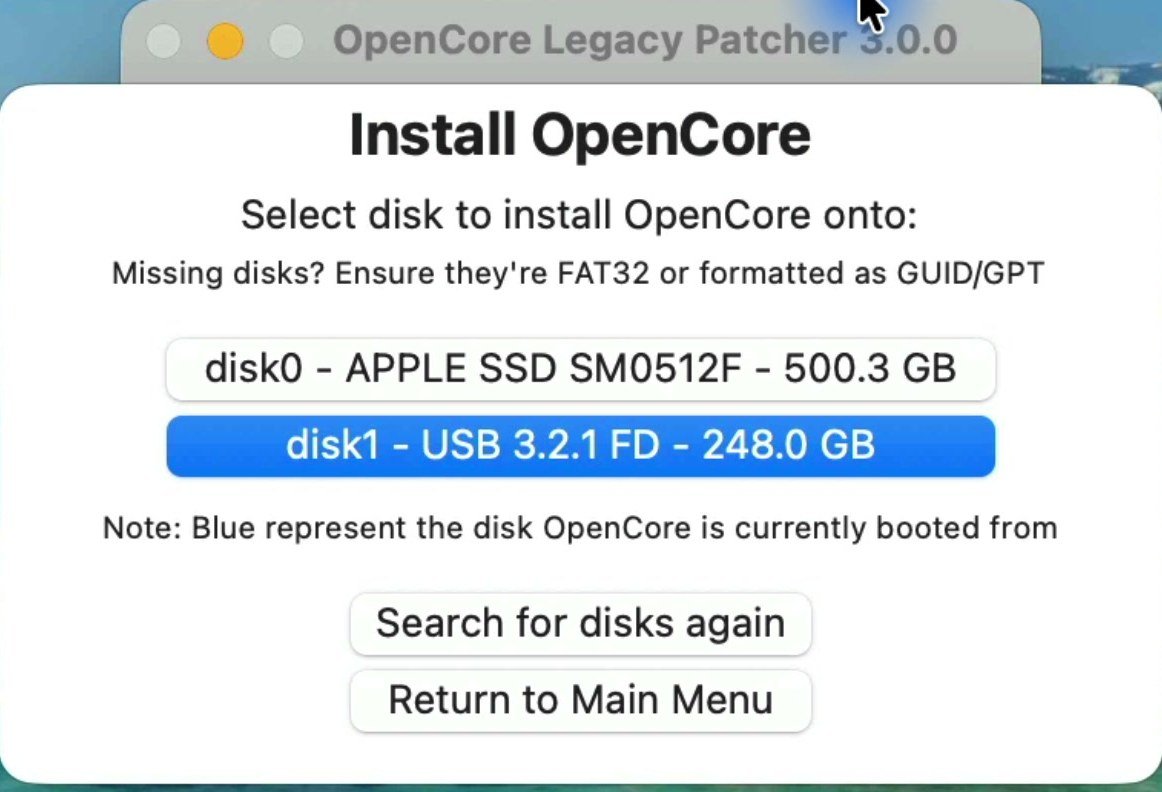
Select its EFI volume. OCLP copies the bootloader to the internal drive. When it finishes, click Reboot.
Step 12: Boot without the USB
To make sure it really works, I pulled the USB drive out as soon as the Mac shut down. On that reboot I got a gray circle with a line through it — the prohibitory symbol — and thought I’d done something wrong.

I waited about 10 to 15 seconds, and the Apple logo came up and Tahoe loaded normally. The same thing happened on this Mac with Sequoia, so it looks broken but isn’t. If it doesn’t recover on its own after a minute or so, plug the USB back in, boot from EFI Boot, and run Step 11 again.
How Tahoe runs on a 2013 MacBook Pro
Here’s where I ended up: macOS Tahoe 26.7.1 on a 2013 MacBook Pro, with Wi-Fi working, ScreenFlow recording, and Chrome installed and browsing websites the way it should. It’s much faster after the post-install root patches, so don’t skip those.
For reference, here’s roughly where the time went on my Mac. Everything else was clicking through prompts.
| Stage | Time on my Mac |
|---|---|
| Download Tahoe 26.7.1 (18.4GB) | ~6 min, plus ~2 min to extract |
| Build the USB installer (256GB PNY) | ~38 min |
| Install OpenCore to the USB | ~1 min |
| Tahoe installer, four automatic restarts | ~24 min |
| Setup Assistant (before the stall) | ~11 min |
| Post-Install Root Patch | ~4 min |
| Whole job | about 2 hours |
That’s not a fresh Apple silicon Mac, and I wouldn’t expect it to feel like one. It’s also a prerelease, so treat this as a project machine rather than the computer you rely on every day.
Turn off automatic macOS updates
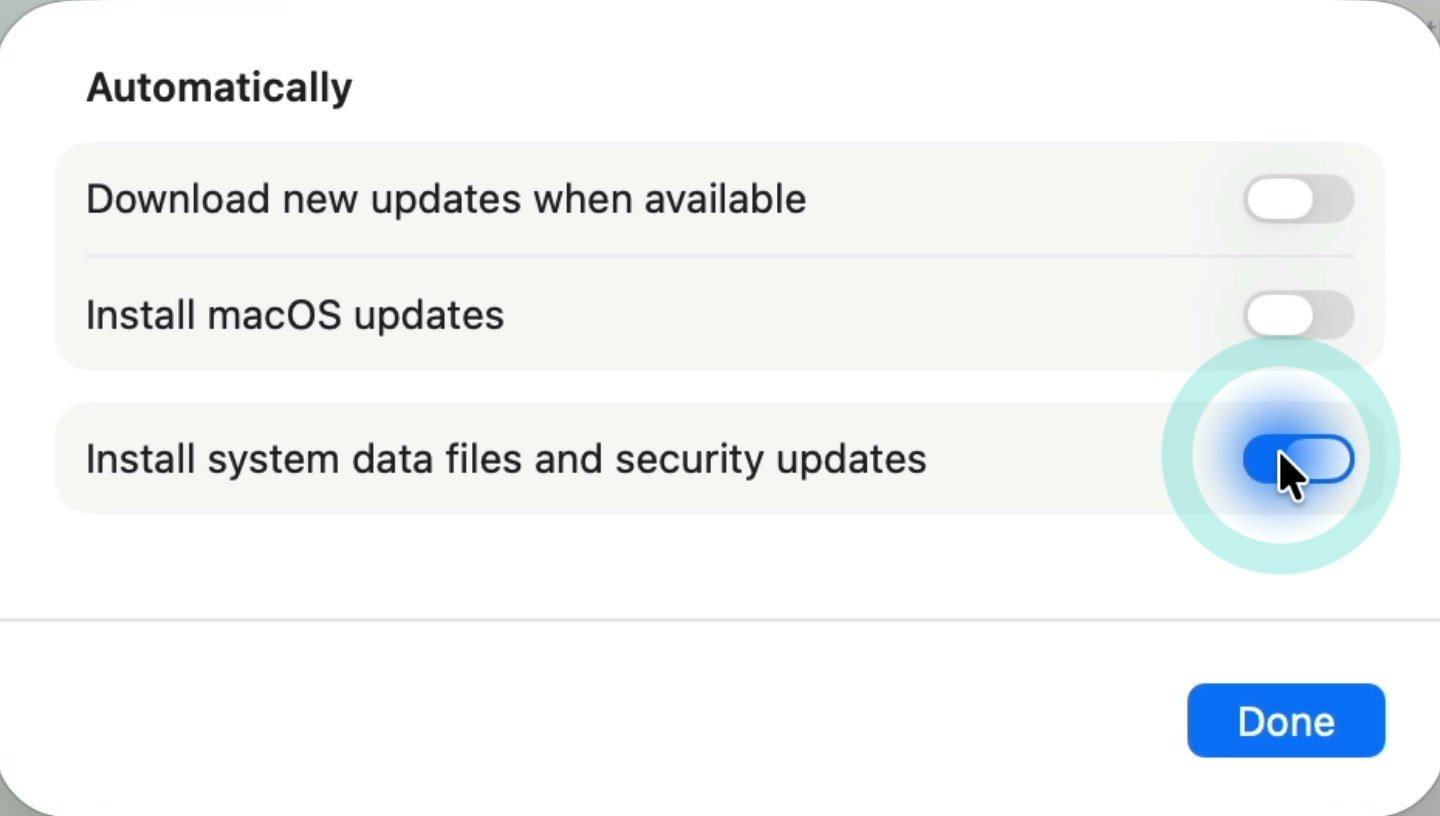
Before Tahoe tries to update itself, go to System Settings → General → Software Update, click the info button next to Automatic Updates, and turn off Download new updates when available and Install macOS updates. Leave them off until you’re ready to handle updates with OpenCore.
When you do update Tahoe later, read Dortania’s guidance on updating macOS or watch an update walkthrough first. Afterwards, open OpenCore Legacy Patcher and run Post-Install Root Patch again — updating macOS can remove some of the root patches, and things start working a little funky until they’re reapplied. Do this after every update. I’ll publish update videos as new OCLP 3.0 releases come out.
If something goes wrong
- No Wi-Fi, sluggish graphics or a laggy mouse: the root patches aren’t applied. Get online another way and run Post-Install Root Patch (Steps 9 and 10).
- OpenCore Legacy Patcher is missing from Applications after the install: that happened to me too. Reinstall OpenCore-Patcher.pkg from the 3.0 release (Step 9).
- Setup Assistant stops responding: force a restart and boot through EFI Boot → Macintosh HD (Step 8).
- The Mac boots to the prohibitory symbol without the USB: wait 15 seconds or so. If it never recovers, boot from the USB and reinstall OpenCore to the internal drive (Steps 11 and 12).
- It keeps restarting or won’t finish booting: follow my Mac boot loop recovery guide before you erase anything.
- You’d rather go back to Sequoia: here’s how to downgrade macOS to an older version.
More macOS upgrade guides
- Install macOS Sequoia on unsupported Macs — the same OCLP approach, for Macs where Tahoe isn’t ready yet
- Upgrade an unsupported Mac to macOS Sonoma — the guide where this series started
- macOS Upgrade Guide — which macOS version your Mac should actually run
- How to downgrade macOS — rolling back if Tahoe causes problems