Learning how to do hanging indents in Google Docs is vital when creating citation documents such as bibliographies and works cited pages.
Common citation styles that require the use of hanging indents include the APA, MLA and Chicago formats.
What exactly are hanging indents?
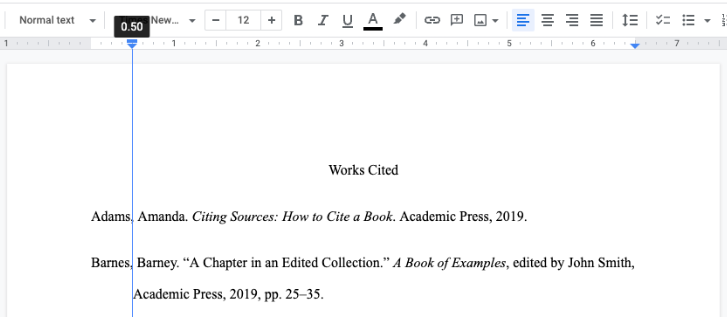
Hanging indents are document indentations that occur on every line of a paragraph except for the first. For citations that only take up a single line, no indentation is needed.
Because of the unique use of hanging indents, special attention is needed to format them properly. Thankfully, there are multiple methods of adding hanging indents to Google Docs files.
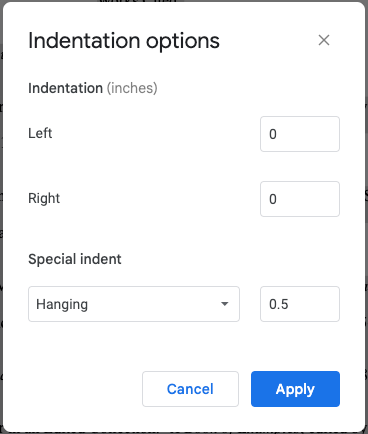
Use Google Docs Indentation Options
Using the Indentation Options feature in Google Docs is the quickest and easiest way to add hanging indentations to your documents. It’s best to complete all other formatting first and then add your hanging indentations at the end.
- Open the document that you would like to add hanging indents to.
- Use control (or command) + a to select your entire document.
- Click on the Format dropdown menu at the top of Google Docs.
- Hover over Align & indent and click Indentation options.
- Make sure the Left and Right fields are set to 0.
- Select Hanging from the Special indent dropdown.
- Set your desired indentation amount (in inches) and click Apply.
Use Rulers to Add Indents
Using rulers to add hanging indents to your documents is a good solution when only one or two lines need to be changed. If you’re working with an entire document, it’s best to use the formatting menu.
- Highlight the paragraph that you would like to add hanging indents to.
- Click and drag the ruler arrow to the desired indent location.
- Click and drag the ruler rectangle back to the left to position 0.
Add Indents with Shift + Enter and Tab
For those who are looking for a more on-the-go method of adding hanging indents to Google Docs, you can simply use the return key and the tab key.
- Click at the end of the line where you want the next line to be indented.
- Hold Shift and press Enter (Return on Mac).
- Press Tab.
- Use the Delete key to remove the extra space.
Note: You may need to adjust your line spacing when using this method.
Hopefully these methods of adding hanging indents to Google Docs files will help you handle any situation that arises where an indent is needed. Although using the formatting menu is simple and easy, it’s good to know that there are other options when in a pinch.